Wool Painting: Making Pictures with Fibre Instead of Paint
5 min read Intermediate
We may earn a commission from links on this page, at no extra cost to you. As an Amazon Associate I earn from qualifying purchases. Learn more.
Flat needle felting onto a background, built up like an oil painting — dark to light, back to front. The method, the materials and the framing.
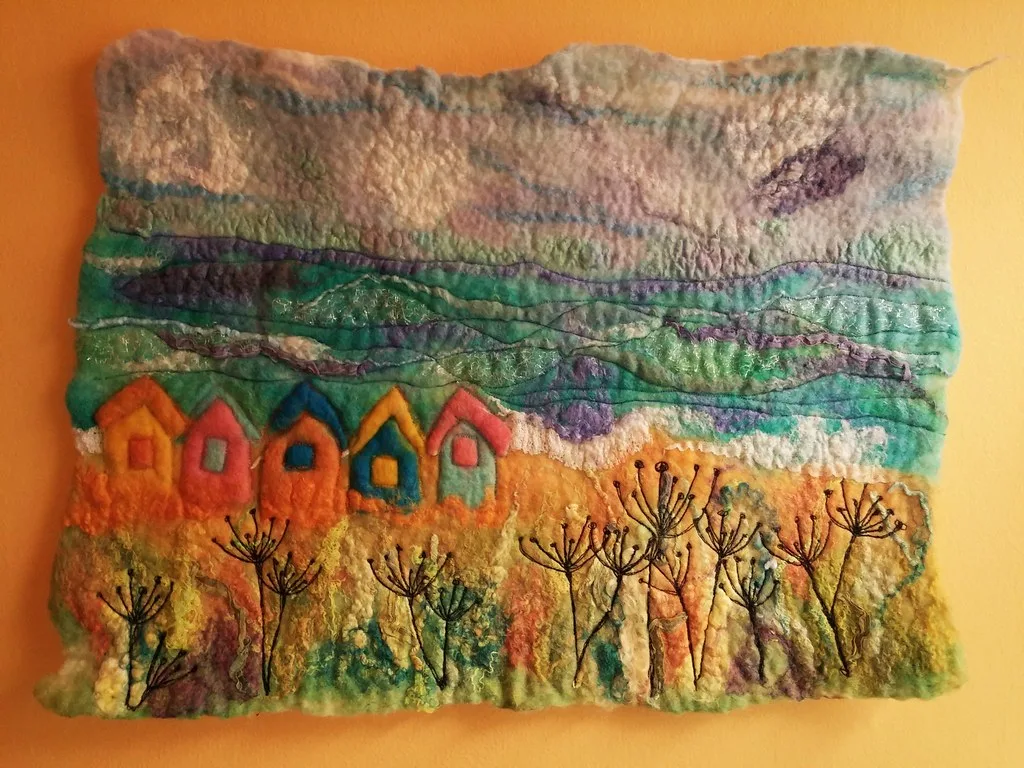
Wool painting is needle felting done flat. Instead of building a shape, you build an image: layers of coloured fibre laid onto a backing and tacked down, working from the background forward and from dark to light, exactly as a painter does.
It is the most forgiving branch of the craft, because nothing is permanent until you needle it, and anything can be covered over.
What the craft is called
The same technique travels under half a dozen names, which makes it unusually hard to search for.
- Wool painting and painting with wool — the commonest names, and the most descriptive.
- Felted painting and needle felted artwork — used for the finished piece rather than the method.
- 2D needle felting and flat felting — used to distinguish it from sculpture.
- Felting artwork — a catch-all that also covers wet felted pictures and nuno wall pieces.
One name that means something else: yarn painting. True yarn painting is the Huichol nierika — lengths of yarn pressed into a board coated in beeswax and resin, with no felting involved at all. The results look related and the method has nothing in common. If you want the wool version, everything below is it.
What you need
- Backing: wool felt sheet 2–3 mm, prefelt, or a piece of wool blanket
- Wool: merino tops in a range of colours — this is where fine fibre genuinely helps
- Needles: 40 gauge for detail, 38 for bulk, and a multi-needle pen for backgrounds
- A thick foam pad, larger than the picture
- A frame — decided before you start, because it sets the size
Choosing the backing
The backing must hold fibre and let the needle through. Wool felt at 2–3 mm is ideal. Thin craft felt tears; thick felt blunts needles. Prefelt is excellent and takes fibre readily. A wool blanket offcut works and gives a soft edge.
Choose the backing colour deliberately — it will show through everywhere you do not cover, and a mid-grey or a soft blue behind a landscape does half the work of the sky.
The method
- Plan the composition. A rough sketch, or a printed reference beside you. Keep it simple: wool painting rewards big shapes and strong tonal contrast, and punishes fussy detail.
- Mark the outlines lightly, either with a few tacking stitches or by laying thin strands of wool where the main boundaries fall.
- Background first. Sky, distant hills, whatever is furthest away. Cover the whole area even where nearer things will hide it.
- Work forward. Middle ground next, then foreground. Each layer overlaps the one behind, which is what creates depth.
- Dark to light. Lay the darkest tones first and build lighter ones on top. Light wool over dark reads well; dark over light goes muddy.
- Thin veils, many of them. Pull fibre so thin you can see through it. Six thin layers give depth that one thick layer cannot.
- Tack, do not bury. Needle just enough to hold the fibre. Over-needling flattens the surface and kills the fibrous quality that makes wool paintings worth making.
- Detail last, with a 40 gauge needle and tiny amounts of fibre — twigs, highlights, eyes, fence posts.
Techniques worth knowing
- Optical blending. Do not mix colours to get a new one. Lay a thin veil of yellow over blue and the eye sees green, with more life in it than pre-mixed green.
- Twisted lines. Roll a few fibres between damp fingertips into a fine cord for branches, stems and outlines.
- Torn edges. Tear fibre rather than cutting it — a torn edge blends into what is beneath, a cut edge shows as a hard line.
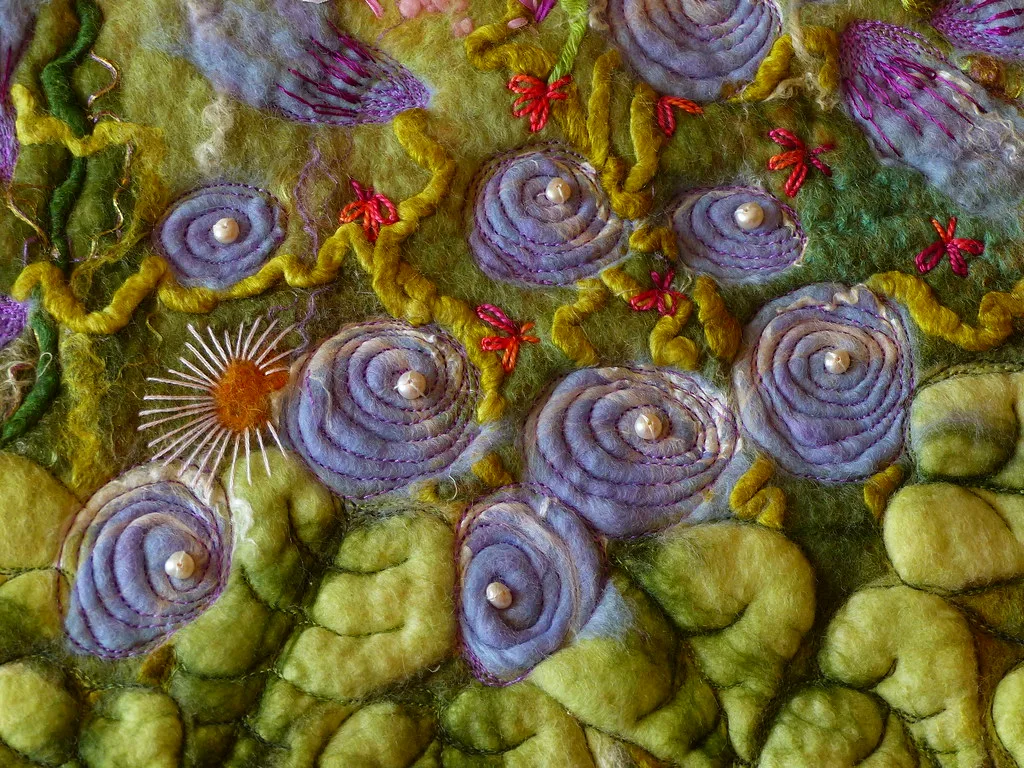
- Texture from other fibres. Silk noil, wool locks, sari silk and angelina for foliage, water, clouds and sparkle.
- Building light. Add the brightest highlights very last, in the smallest quantity, on top of everything.
- Pre-blended gradients. Rolags from a blending board give skies that change colour as you lay them.
What subjects work
Wool is a soft, slightly diffuse medium with a limited palette and no crisp edges. That pushes it towards particular subjects:
- Landscapes — the obvious and best use. Skies, hills, fields and trees are all soft-edged.
- Animal portraits — fur is fibre, so the medium is doing what it already is. See needle felted pet portraits.
- Flowers and botanicals — strong colour, forgiving shapes.
- Seasonal scenes — snow, autumn woods, the sea.
- Abstract colour work — where the fibre texture itself is the subject.
Architecture, lettering and anything needing straight lines fight the medium.
Finishing and framing
- Trim the backing to the frame size, allowing a couple of centimetres to wrap.
- Mount it on stiff card or foam board, either stretched round and taped at the back or laced.
- Frame without glass if you can. Glass flattens the texture, which is the whole point of the medium. A deep box frame with a spacer is the compromise if the piece needs protecting.
- A mount board lifts the glass off the surface and looks better than a flush mount.
Unglazed pieces will collect dust and are vulnerable to moths — worth knowing before you hang one for a decade. See protecting wool from moths.
Common problems
- It looks flat. Not enough tonal range. Push the darks darker and the lights lighter.
- It looks muddy. Too many colours mixed, or dark laid over light. Cover the area with a thin veil and rebuild.
- Hard edges everywhere. The fibre is being cut or torn too crisply. Feather the edges.
- The surface has gone hard. Over-needled. Lay a new thin layer on top and tack it lightly.
- The backing shows through. Add more layers — this is normal and expected on the first pass.
Where it sits in the craft
Wool painting shares its materials with everything else here but almost none of its habits — there is no shaping, no firming and no density to build. If you have only done sculpture, expect the first attempt to be over-needled. If you have only painted, expect the first attempt to be under-layered. Related flat work includes needle felting on fabric, felt applique and the surface techniques in wet felting art. The flat, shaded surface transfers directly to sculpture that is more picture than form: the banded flank of a needle felted fish, or the scute pattern on a needle felted turtle shell, are both laid on as painting rather than built.
Frequently asked questions
What is wool painting?
Making a picture by needle felting coloured wool onto a flat backing, building it up in layers like a painting. It is also called 2D needle felting, felted painting or painting with wool, and the wool is never cut — colour is blended by overlapping fibres.
What do you needle felt a picture onto?
A sheet of wool felt, a piece of prefelt, or wool fabric such as a blanket offcut. It needs to be dense enough to hold fibre but open enough for the needle to pass through — around 2 to 3 mm of wool felt is ideal.
How do you blend colours in wool painting?
By overlapping thin veils, not by mixing. Lay a thin layer of one colour over another and the eye reads the combination — the same way glazes work in oil painting. Pre-blending on a blending board gives smoother gradients still.
Do you need a special needle for 2D felting?
A 40 gauge needle for detail and a multi-needle pen for the background covers everything. Fine needles leave smaller holes, which matters much more on a flat surface than on a sculpture.