Felt Turtle: Needle Felting a Tortoise or Sea Turtle, and a Sewn Felt Turtle
7 min read Beginner
We may earn a commission from links on this page, at no extra cost to you. As an Amazon Associate I earn from qualifying purchases. Learn more.
Tortoise or sea turtle is the first decision, because they differ in every part. How to felt a firm shell as its own piece, mark the plates, build either animal, and sew a patchwork felt turtle from sheet felt.
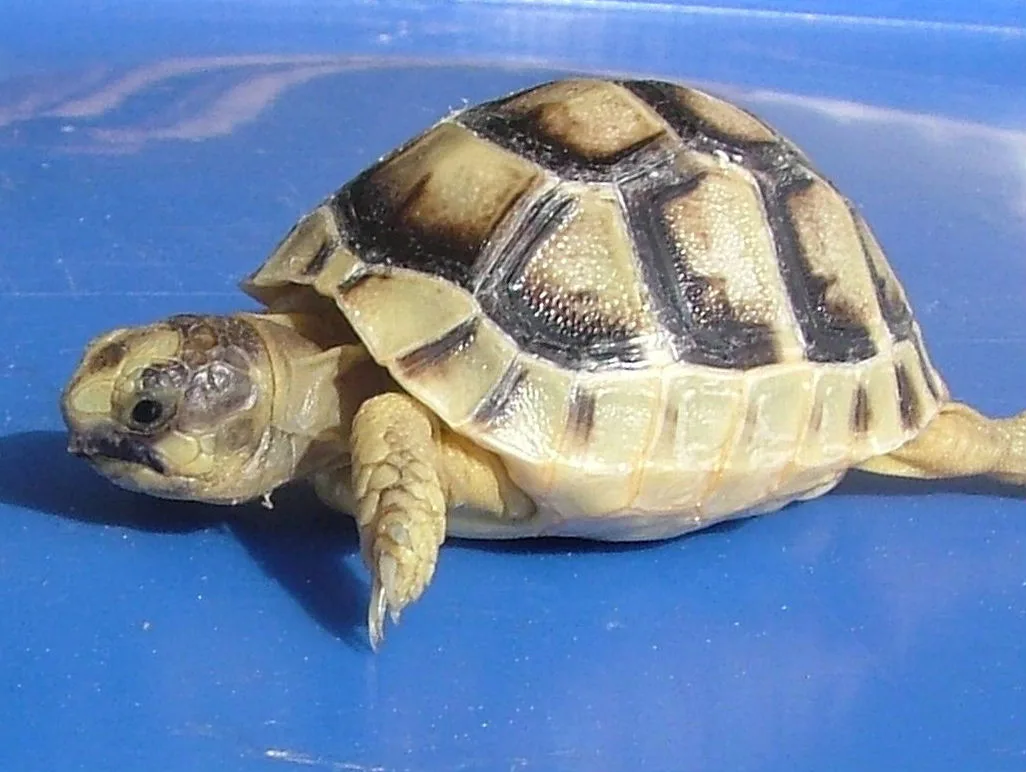
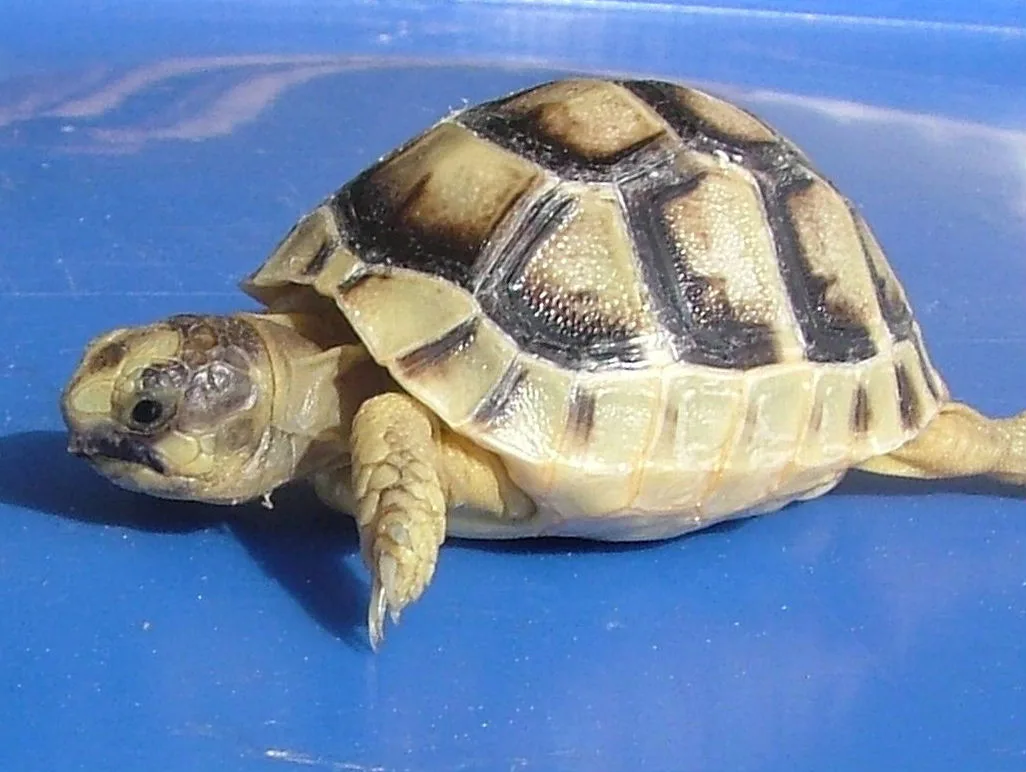
Tortoise or sea turtle: that is the first decision, and it has to be made before you pick up any wool, because almost every shape afterwards depends on it. A medium dome on four medium legs, which is what you get by not deciding, is an animal that does not exist.
| Tortoise | Sea turtle | Box turtle | Terrapin | |
|---|---|---|---|---|
| Shell | Tall, steep dome | Flat, wide teardrop | High dome | Low, flattened dome |
| Legs | Short thick columns | Long flat flippers | Short, clawed | Webbed feet |
| Head | Low, on a thick short neck | Reaching forward | Low | Forward |
| Colour | Olive, brown, sand | Olive-brown shell, pale scaled skin | Dark shell with yellow-orange marks | Olive shell, yellow stripes on the neck |
| Wire needed | No | In the front flippers | No | No |
This page builds the tortoise in full, then shows what changes for a sea turtle, then covers a sewn version from sheet felt like the patchwork turtle in the photo at the top. On every version, the shell is what makes it read as a turtle, so most of the attention goes there.
The shell comes first, on its own
The most common failure is a lumpy, soft shell, and it happens because the shell was built onto a body that already has legs and a head. After that you cannot press hard without squashing them, so you stop needling early. Make the shell as a separate piece, finish it, and attach everything else afterwards.
Over a form. Wrap wool round a wooden egg, half-ball or large smooth bead and needle it all over until it is dense and holds its curve, then slide the form out and close the open edge. This gives the smoothest dome and is the way to make several shells that match. Keep the needle shallow; driving it into the wood is how needles break (how to stop breaking felting needles).
Solid and flattened. Felt a solid ball of core wool about 5 cm across as hard as you can, then needle one side flat on the mat until it sits without rocking. No tools, and the result is denser, which suits a small tortoise that should feel like a pebble in the hand.
Either way, add a thin band of wool round the edge where the dome meets the base and needle it into a slight overhanging lip. Real shells flare a little at the rim, and without that lip the shell looks like half a ball. Then cover the dome in two thin veils of olive and brown and needle the surface smooth and dense enough to draw on.
Marking the plates
A plain dome in green wool is just a green dome. The plates, called scutes, turn it into a shell, and their layout is regular enough to draw from memory:
- a centre row of five roughly six-sided plates running from front to back along the top;
- four large plates on each side of that row, wider than they are tall;
- a ring of small, narrow plates round the rim, about twelve on each side.
Mark the lines with the tip of a 42 gauge needle held at a low angle, using many shallow stabs along the line and going over each line several times. Never drag the needle sideways: a 42 gauge is the finest in normal use and snaps easily. Do the centre row first, then the side plates, then the rim, so that any drift ends up at the edge. To darken a line, work a little brown fibre into the groove with the needle tip once it has formed.
Do not paint or embroider the lines. Paint bleeds along the fibres and stiffens the wool, and stitches sit on top of the surface. Either way the shell looks decorated rather than made of plates.
Needle felting a tortoise
Materials
- Core wool: 25–35 g
- Olive, mid brown and sand corriedale: about 10 g in total
- 38, 40 and 42 gauge needles and a foam pad
- Optional: a wooden egg or half-ball, and 3 mm black glass eyes
Steps
- Shell. Make and mark it as above, before anything else.
- Legs. Four short thick cylinders about 2 cm long and 1.5 cm across, blunt at the foot, loose at the top. Tortoise legs are columns like an elephant's, not tapers. Needle them hard.
- Attach the legs. Push the loose fibres up under the rim and needle them into the underside, angling all four slightly outwards. Stand it up and adjust until it sits level.
- Neck and head. A short thick stub coming forward from under the front rim, angled down, with a small blunt wedge of a head. A raised neck makes it look like a snake.
- Tail. A tiny pointed cone under the back rim.
- Face. Two small dark eyes low and forward on the sides of the head (needle felting eyes), a needled line for the mouth and two shallow dents for nostrils.
- Skin. Cover the legs, head and neck in sand or grey-brown, and add a few needled creases at the neck and knees.
What changes for a sea turtle
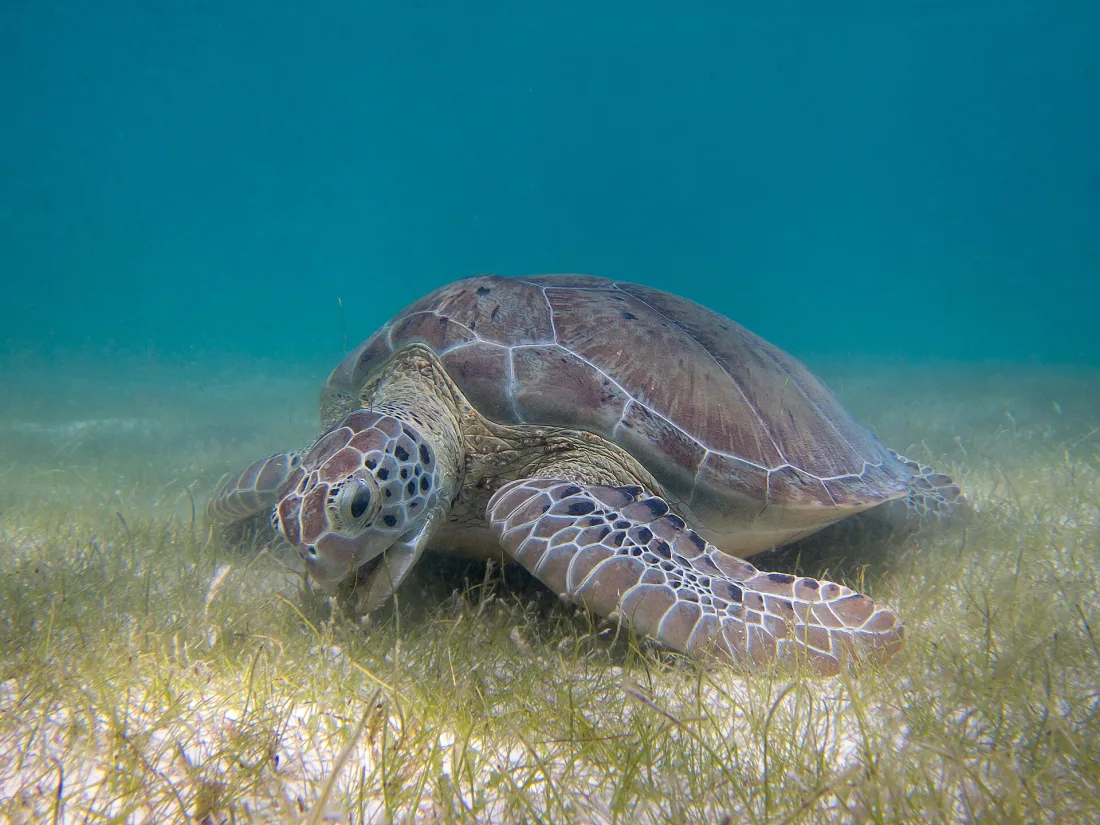
- Shell. Make it flat and wide, a teardrop about twice as long as it is tall, pointed at the back. Felting over a form is less useful here; felt it flat on the mat and shape the curve with your fingers as you go.
- Plates. The same layout, but lower and longer. Green sea turtles have a smooth shell with no overlapping plates; the hawksbill's overlap like roof tiles.
- Flippers. Two long front flippers, about as long as the shell is wide, and two short rounded back flippers. Make them as flat blades, not cylinders. Put a pipe cleaner inside each front flipper so it can be bent mid-stroke.
- Head. Larger than a tortoise's, rounded, held forward and slightly up, with a short, beak-like mouth.
- Skin. Pale with a pattern of darker scales on the head and flippers. Mark it with the same needle-tip grooves as the shell, smaller.
A hatchling sea turtle is a quick variation: a 3 cm shell in dark grey-brown with an oversized head and flippers. They look best in a group of five or six on a felted sand base.
A sewn felt turtle
The turtle at the top of the page is made from sheet felt, not needle felted. It is a good sewing project and a sturdy toy. The patchwork shell is the charm of it.
Pieces
- Shell top: an oval about 14 × 11 cm, cut into patches. Cut one six-sided centre patch and six to eight surrounding patches from two or three shades of green or brown, plus a narrow border in a paler colour. Or cut the shell as one piece and appliqué paler hexagons onto it.
- Underside, cut 1: a flat oval 1 cm smaller all round than the shell top.
- Gusset, cut 1, optional: a strip 2 cm wide and as long as the shell's edge, to give the shell height.
- Head, cut 2; legs, cut 8 (four pairs); tail, cut 2.
Assembly
- Butt the shell patches edge to edge and join them with a zigzag or herringbone stitch so the shell lies flat. Felt does not fray, so no seam allowance is needed.
- Stitch each pair of head, leg and tail pieces together round the edge, leaving the straight end open, and stuff them lightly.
- If you are using a gusset, stitch it round the edge of the shell top first.
- Lay the underside against the shell with the head, legs and tail tucked between them, open ends inward, and blanket stitch round, leaving a 4 cm gap at the back.
- Stuff the shell firmly through the gap, close it, and add eyes as French knots or small buttons. Use embroidered eyes for toys meant for young children.
For a flat turtle ornament, skip the gusset and stuffing, cut the whole outline twice and stitch round it with a loop at the top. Felt plushies covers stitches and felt choice, and felt appliqué covers the hexagon method.
Common problems
| Problem | Cause | Fix |
|---|---|---|
| Looks like a beetle | Smooth dome, no plates, no rim | Add the flared lip and needle the plate lines |
| Shell rocks | Underside curved | Needle straight down into the middle of the base until flat |
| Looks like neither animal | Medium dome, medium legs | Commit to a steep tortoise dome or a flat sea turtle shell |
| Legs splay | Soft legs or a weak join | Firm the legs hard before attaching and push more fibre into the body |
| Plate lines disappear | Surface too soft and thick | Needle the surface dense first, then draw |
| Sewn shell puckers | Patches overlapped instead of butted | Butt the edges and zigzag across them |
The shallow-needle drawing used for the plates turns up again in needle felting techniques. For another animal built from a firm ball and separate limbs, try a hedgehog, and if your shell came out soft, needle felting mistakes explains why density is usually the first thing to fail.
Frequently asked questions
What is the difference between felting a tortoise and a sea turtle?
A tortoise has a tall, steep domed shell on four short, thick legs, with its head held low. A sea turtle has a flat, wide, teardrop-shaped shell, long flat flippers and a head that reaches forward. Choose one before you start, because they differ at every step.
How do you felt a smooth, firm turtle shell?
Make the shell as a separate piece, before any legs or head. Either felt wool over a wooden egg or half-ball and slide it out, or felt a solid ball very hard and flatten one side on the mat. A shell built onto a finished body stays soft, because you cannot press hard without squashing the legs.
How do you mark the plates on a felted turtle shell?
Trace the lines with repeated shallow stabs from a fine 42 gauge needle held at a low angle, going over each line several times until it holds. Do not drag the needle sideways, because a 42 gauge snaps easily. Paint and embroidery sit on top and look applied; a needled groove looks like part of the shell.
How do you make a sewn felt turtle?
Cut a round or oval shell top from several felt patches stitched together, a flat oval underside, and a head, four legs and a tail. Sandwich the head, legs and tail between the top and underside, blanket stitch round, and stuff the shell through a gap before closing it.
Is a felted turtle good for beginners?
A tortoise makes a good second or third animal. It is a ball, four cylinders and a short neck, with no balance problem and no wire. It takes about ninety minutes, and the plate lines need a steady hand. A sea turtle with posed flippers needs wire and is harder.
Image credits
- A felt turtle toy with a patchwork shell standing on grass — kator29 (BY SA)
- A tortoise in side view showing the domed shell and low head — Mayer Richard at English Wikipedia (BY SA 3.0)
- A green sea turtle swimming — P.Lindgren (BY SA 3.0)