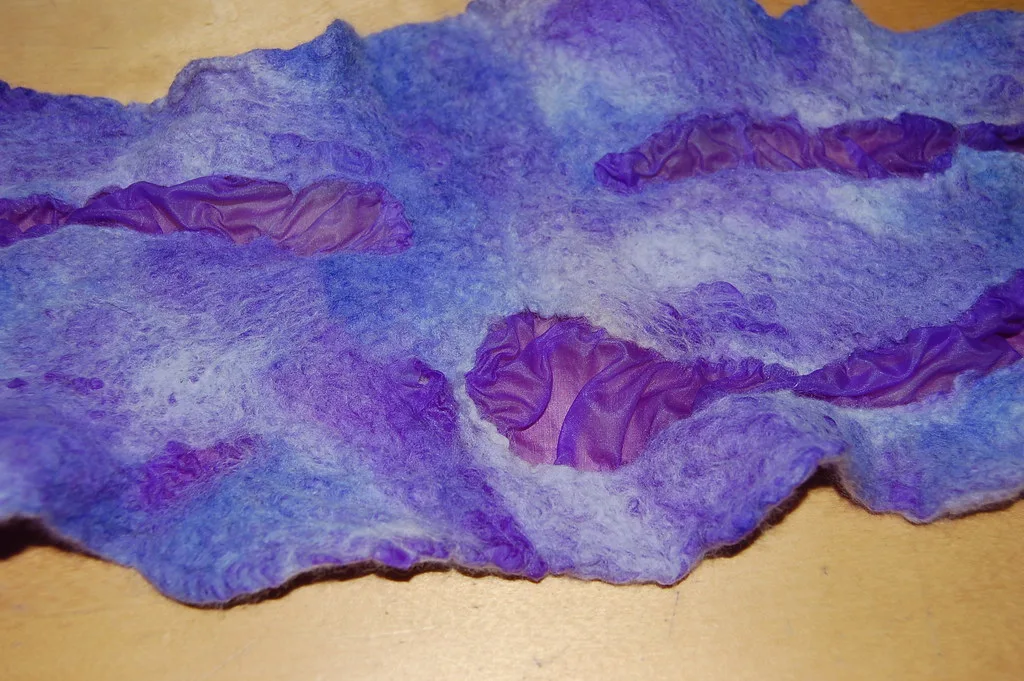
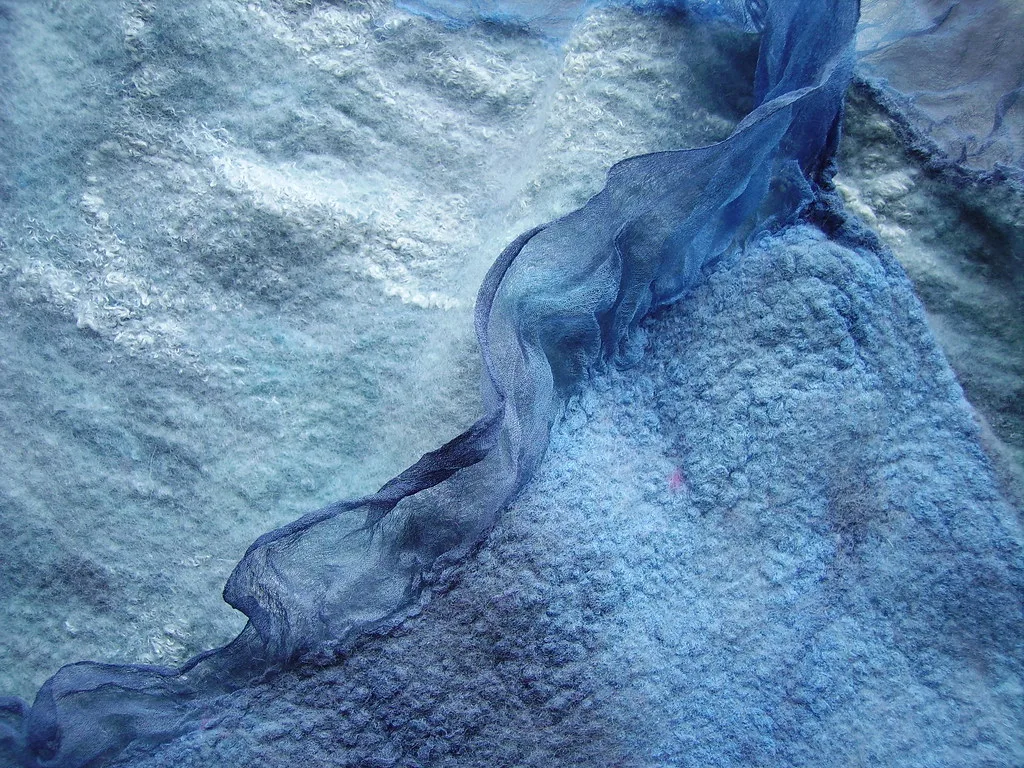
Nuno felting is wet felting carried out through a woven cloth instead of on its own. You lay the wool thinly enough that the fibres can travel between the threads of the fabric, felt on the far side, and lock the two materials together for good. What comes off the mat is not felt with cloth stuck to one face. It is a single material that folds, gathers and hangs in a way plain felt never manages.
The name comes from the Japanese nuno, meaning cloth. Polly Stirling and Sachiko Kotaka developed the method in New South Wales in the early 1990s, looking for a way to make felt light enough to wear in Australian heat. That constraint shaped everything about the technique: the wool is a veil rather than a layer, and the fabric carries the strength.
Start here:
What nuno felting is and why it drapes
The felting itself is ordinary. Wool fibres are covered in overlapping scales; hot water and soap make those scales stand away from the shaft, agitation ratchets the fibres past one another, and the scales stop them sliding back. That is the whole of what felting is, in nuno or anywhere else.
What is different is the geometry. A bundle of fibres sitting on top of a woven cloth is pushed through a gap in the weave, and once its far end has felted to whatever else came through nearby, the fibre cannot be pulled back out. The thread of the fabric is trapped inside a loop of felted wool. Nothing is glued and nothing is stitched; the cloth is held mechanically, and it holds so well that a properly finished piece cannot be separated by hand.
Two consequences follow, and both explain the drape.
First, the cloth supplies the tensile strength, so the wool does not have to be structural. In ordinary wet felting the wool has to hold itself together, which sets a floor on how thin you can go — usually two or three crossed layers. In nuno the floor is gone. A veil you can read a newspaper through is enough, because the silk underneath is doing the load-bearing. A wet-felted scarf might swallow 100 g of wool. The same length in nuno takes 30 to 40 g.
Second, wool shrinks and cloth does not. Merino will pull in by roughly a third as it fulls; the silk or cotton beneath it stays exactly the size it started. The fabric has to go somewhere, so it gathers into ridges, blisters and ruching between the felted areas. That texture is the signature of nuno felting rather than a fault in it, and once you understand that the wool controls where the gathering happens, you can design with it.
Fabrics that work and the light test
Openness of weave decides everything, and it matters far more than fibre content. A loosely woven polyester will nuno felt when a densely woven silk will not. People assume silk is compulsory because most nuno felting is done on silk, but that is only because silk is easy to buy in very open weaves.
The light test takes five seconds and settles it. Hold the fabric up to a window. You are not looking for a general glow coming through — you are looking for visible gaps between individual threads. If you can see daylight through the holes, wool can go through them too. If it reads as solid cloth, no amount of rubbing will change that.
Follow it with a pinch test. Scrunch a corner in your fist and let go. Fabric that springs back stiff and crisp is usually either too tightly woven or heavily finished. Fabric that stays soft and crumpled is generally a good candidate.
Silk gauze is the most forgiving place to start, silk chiffon close behind, and cotton muslin or cheesecloth costs almost nothing and behaves nearly as well — which makes it the sensible thing to practise on. Light habotai works with patience; heavy habotai, dupioni, taffeta, satin, quilting cotton, denim and tight knits do not. The comparisons, weights and failure modes are set out in full in our guide to the best fabrics for nuno felting.
Whatever you choose, wash and dry it before you lay a single fibre. Mills apply sizing, starch and finishing treatments that sit on the surface of the threads and block migration completely. A fabric that ought to work and inexplicably refuses is nearly always an unwashed one. A hot wash also gets any shrinkage out of the cloth before it can pucker your finished piece unpredictably.
Wool: merino fineness and how little you need
Use fine merino tops, 18 to 19 micron. This is the one place in felting where fibre diameter is not a matter of taste. A fibre has to fit through a gap in the weave, so a thick fibre in a fine weave simply stops at the surface. Anything much above 23 micron will struggle on silk gauze no matter how long you work it, and coarser breeds will not go through at all. Our page on merino wool for felting covers how micron counts are graded and what to look for when buying.
Quantity is the other half, and almost everyone gets it wrong the first time. Reckon on 30 to 50 g of merino for a scarf around 180 by 40 cm, before shrinkage. That is a startlingly small pile of wool spread over that much cloth, and it will look wrong while you are laying it out. Trust the numbers rather than your eye.
How you pull the wool matters as much as how much. Split the top lengthwise into narrower ropes first, then draw wisps off the end with your hand a good span away from where you are gripping, so the fibres slide out full length instead of tearing. Lay each wisp down so thinly that it is translucent. The working test is simple: you should be able to read printed text through the wool before you wet it. If the fabric is hazy rather than clearly visible through the fibre, you have used too much, and you will end up with ordinary felt that happens to have cloth on the back of it — stiff, heavy, and with none of the drape you were after.
Bear in mind that the fabric colour shows through everywhere, because the wool is thin everywhere. White merino over red silk reads pink. Test combinations on a sample rather than assuming the wool colour will win, because in nuno felting it usually does not.
Layout patterns
Because felted areas shrink and bare cloth does not, the layout is not only a pattern — it is a set of instructions for where the piece will gather. Four approaches cover most work.
All-over veil
An even film of wool across the whole fabric, wisps laid in one direction and then a second sparse pass at right angles. This is the most stable layout and the one to learn on. Shrinkage is fairly uniform, the surface takes a soft even crinkle, and the piece behaves predictably when you cut or sew it.
Stripes and bands
Wool laid in bands with bare fabric between them. The wool bands pull in hard, the bare bands have nowhere to go and blister up into ridges. Bands running across a scarf give a concertina texture; bands running along it give long soft channels. Keep them at least a few centimetres wide, or the wool will bridge the gaps as it shrinks.
Edges only
Wool along the two long edges of a scarf and nothing in the middle. The edges felt, shrink and firm up; the centre stays sheer silk and ruffles between them. It uses very little wool, is quick, and produces some of the lightest wearable pieces in the technique.
Both sides
A veil on the face and a second on the back, so the fibres meet inside the weave. The bond forms faster and more reliably, the piece is reversible, and it comes out flatter with less ruching, because the wool is pulling evenly from both faces rather than curling the cloth towards one. Worth using on a coarser or denser fabric that has been reluctant on a single-sided test.
The process: wet, rub, roll, watch the ruching
Lay the washed fabric smooth on bubble wrap, wrap side up, and lay your wool out on it. Cover the lot with net curtain or fine tulle.
Wet it down with hand-hot soapy water. Sprinkle, or press it in with a wet sponge, and never pour — a wool veil this thin will float and shift, and once it has moved you cannot tidy it. Press through the net with flat hands until the piece is wet through with no dry pockets and no standing water. An olive oil soap or plain soap bar suits this better than detergent; there is more on this in our note on the best soap for felting.
Now rub through the net, small circles, very little pressure. Nuno is slower to start than ordinary wet felting because nothing holds until the fibres have travelled through the weave. Heavy rubbing at this stage only slides the veil around and tears holes in it.
After about ten minutes, peel back a corner of the piece and look at the underside of the fabric. You are looking for fine wool fibres poking through the weave. When you can see them across the whole piece, migration has happened and you can start working firmly.
Then roll. Wrap the sandwich around a pool noodle or length of pipe, roll it under your forearms a hundred times, unwrap, turn the piece ninety degrees, and repeat. Four to six cycles is typical. This is where the shrinking happens, and it is where the ruching appears: the fabric starts to crinkle and gather between the wool. That is your progress indicator. When the texture stops developing, the wool has finished pulling in.
Test the bond by pinching the wool and lifting gently. If the fabric comes with it and nothing separates, you are done. If the wool lifts away on its own, keep rolling.
Rinse in warm water until the soap is out, then a cold rinse with a splash of vinegar to bring the pH back down. Squeeze — do not wring — roll in a towel, and lay flat to dry. Decide before it dries whether you want the ruching or a smoother surface: stretching and ironing while damp will flatten it, and once dry it sets.
First projects
Make a sampler before you make anything. Work at about 30 by 30 cm, lay four or five different fabrics side by side as strips, and put one continuous wool layout across all of them. In a single session you learn how each fabric migrates, how much each puckers and which you actually like the look of. Label it and keep it — it doubles as a shrinkage reference, and you will want those numbers before you cut fabric for anything sized.
A long narrow scarf is the classic first real piece. The construction is the same as a wet felted scarf, at a fraction of the weight, and the shape is forgiving because nobody can tell whether a scarf finished at 168 cm or 175. Start with the edges-only or striped layout rather than an all-over veil; both use less wool and both hide small unevenness in the texture.
After that, a wrap is simply a wider scarf with more fabric to keep smooth, and a flat panel — for a cushion front, a bag face, or a piece to stretch and frame — is the easiest way to experiment with layout patterns, because it does not have to drape or fit anybody.
Common problems
The wool will not bond. Three causes, in order of likelihood: the fabric still has its mill finish on it, the weave is too tight for the fibres to pass, or the wool is too coarse. Wash the fabric, do the light test again, and check the micron count on your wool. If plain wet felting is also failing for you, the problem may be upstream of the fabric altogether — see why won't my wool felt for water temperature, soap and fibre faults.
It came out stiff and heavy. Too much wool. This is the most common first attempt in the whole technique. Halve the quantity next time and lay it thinner than feels sensible.
Holes and bare patches in the wool. Either the veil was uneven to start with, or you rubbed too hard before migration and dragged it apart. Both are fixed by laying more carefully and going gentler for the first ten minutes.
The wool peeled off after drying. Under-felted. Migration began but never finished, so the fibres were sitting in the weave rather than locked through it. Re-wet the piece and keep rolling; it can usually be rescued.
Uneven shrinkage, or a piece that came out crooked. Usually an uneven layout — thicker wool in one region pulls harder than thinner wool elsewhere. It can also come from rolling only in one direction, which shrinks the piece lengthwise and leaves it narrow and skewed. Change direction every cycle.
The fabric tore. Very fine silk gauze will give way under aggressive rolling, especially over a hard noodle. Ease off, add a layer of bubble wrap, or work on a slightly sturdier cloth while you are learning the feel of it.
Nuno sits at the fine end of a family of techniques that all rely on the same wool behaviour. Wet felting is the parent method and the place to build the hand skills — soap, temperature, rolling rhythm — that nuno then demands more precision from. Understanding how much wool shrinks is what lets you size a garment rather than hope, and it is the same arithmetic whether or not there is fabric involved.
Beyond that, nuno combines readily with other work: dyed silk grounds, stitching once the piece is dry, and lace or yarn trapped under the veil during layout. Because the finished cloth is thin and stable it also sews much more like a fabric than plain felt does, which makes it the felting technique most worth learning if you want to make clothes.