Needle Felted Fish: A Flat Body and Fins That Hold Their Shape
6 min read Beginner
We may earn a commission from links on this page, at no extra cost to you. As an Amazon Associate I earn from qualifying purchases. Learn more.
Nothing about a fish body says fish. The fins and tail do all the work, and they only work if the body underneath is a flattened teardrop rather than a sausage.
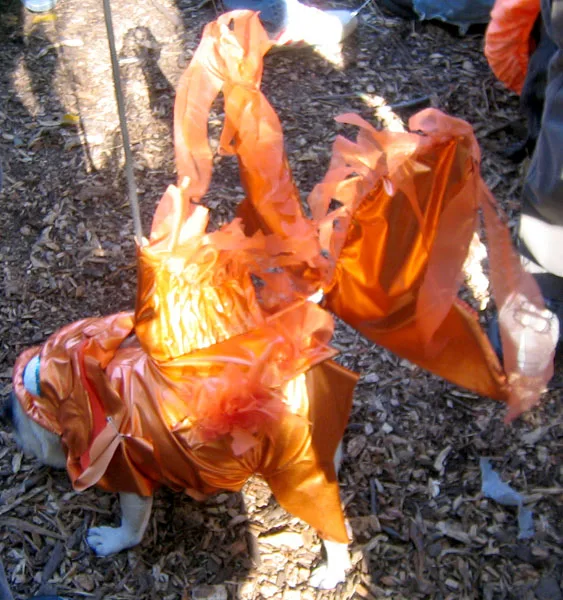
A fish body carries almost no information. Strip the fins off a goldfish and you are left with a flattened teardrop that could be a leaf or a mango. Everything that reads as fish lives in the fins and the tail, and both of them depend on what is underneath: a body flattened into a blade rather than rolled into a sausage.
So the project is two skills. Flattening a body evenly without it going lumpy, and making fins firm enough to hold their shape — for which there are exactly two methods, one of which is worth doing.
What you need
- Core wool — 15–20 g for a 10 cm fish
- Orange, white and a deeper rust corriedale for a goldfish
- A sheet of prefelt for the fins, or 5 g of loose fibre to make your own
- 38 gauge needle for bulk, 40 gauge for the surface and the fin joins
- A firm foam pad — a soft one lets the flat faces bounce instead of compacting
- Two 6 mm black glass eyes, or black fibre — large for the size of fish, on purpose
- Small sharp scissors for cutting the fins
Building the fish
- Wind a tight core. Roll the core wool into a firm oval about 9 cm long, as you would a felted ball. The flattening only works if the inside is already dense.
- Set the outline first. Needle the side profile before flattening anything: a deep rounded front third, a high point behind the head, then a long taper to a narrow wrist about a third of the body depth.
- Flatten it. Press the whole piece between your palms, then needle the two flat faces in alternating rounds until the body is roughly a third as wide as it is deep. Full method below — this is the step that goes wrong.
- Firm the back and belly edges. Needle along the top and bottom to sharpen them into ridges. A fish is not a disc with rounded rims; both edges come to a definite line.
- Add the surface colour. Two thin veils of orange, a deeper rust along the back, and pale cream low on the belly. Blend the boundary along the flank rather than leaving a hard edge — see how to blend wool colours.
- Mark the head. Needle a shallow curved groove from the top of the head down behind the eye to the belly. That one line separates head from body and does more than any amount of detail.
- Set the eyes. Large and round, one on each flat face, low and forward just above the mouth line. Fish eyes are on the sides, not the front. Glass on wires or a needled black disc both work — see needle felting eyes.
- Attach the tail, then the fins. Tail first, needled into the wrist so it sits in line with the flat faces. Then the dorsal fin along the back, a pair of pectorals just behind the gill line, and an anal fin low and to the rear.
- Check it edge-on. Sight down the fish from the nose. The fins should be symmetrical and the tail in the same plane as the body, not twisted.
Flattening a body without lumps
Lumps happen because people flatten one face at a time and stab at whatever angle is comfortable. The core compresses in a wedge and you spend twenty minutes chasing a hollow across the surface. Four rules fix it:
- Alternate faces every twenty or thirty stabs. Never bring one side to completion. The two faces have to come in together or the middle skews.
- Stab straight down, at ninety degrees to the face. Angled stabs drag fibre sideways and build a ridge where you did not want one.
- Keep the depth constant. Deep in one place and shallow in another is exactly how you get a dimple. Full depth, even rhythm, whole face together.
- Press between rounds. Squeeze the body flat between both palms every so often. Compression does half the work and the needle only holds it there.
If a hollow does appear, do not needle around it to bring the rest down — add a wisp of wool into the hollow and needle it flush. Working the high ground harder just makes the whole fish smaller and the hollow stays.
Two ways to make fins
1. Cut from prefelt or a thin felted sheet — do this one
Take commercial prefelt, or lay a thin even layer of fibre on your mat and needle it flat from both sides into a firm sheet about 2 mm thick. Cut the shapes out — a fanned triangle for the tail, a long low arc for the dorsal, small rounded paddles for the pectorals.
Then needle only the base into the body — the 5 mm nearest the join, with a 40 gauge needle. Everything beyond that stays untouched, so it keeps the density and the crisp cut edge it already has.
The advantages are structural. The sheet was felted flat on a mat, so it is uniformly firm end to end; the cut edge is clean, which is what makes a fin read as a fin; and because only the base is attached, handling cannot gradually soften it. One sheet also gives you every fin in an identical colour.
2. Fibre laid and needled thin on the body
The alternative is to lay wisps of fibre against the body, needle them down at the root, then needle the free part thin against your mat. A fin appears, but it is thickest at the join and softer towards the tip, because that is the only order you can work it in. The edges come out furry rather than cut, and the middle cannot be firmed properly — needling it means pressing it against the body, which then grabs the fibres you wanted free.
Use it only where soft and wispy is the point, such as the trailing veil tail of a fancy goldfish. For a fin that should read as a stiff spread of rays, cut it from a sheet.
Common problems
- It looks like a mango. The body was never flattened enough. A third as wide as it is deep is the target; most people stop at two-thirds.
- The fins droop. They were loose fibre, or needled all over instead of only at the base. Cut new ones from prefelt and attach at the root.
- Dimples across the flanks. Uneven needle depth. Fill each hollow with a wisp rather than needling the area around it down to meet it.
- The tail sits at an angle. The wrist was rounded, so there was nothing to line the tail up against. Flatten the wrist before attaching anything.
- The eyes look wrong. Too small, too high or too far back. Fish eyes are large, low and close to the mouth — one of the sizing errors covered in needle felting mistakes.
Variations
- Goldfish. Deep body, short and tall, large fanned tail — the classic, and the easiest to get right.
- Fancy fantail. Same body, but a double trailing tail made by the loose-fibre method — the one place it wins.
- Koi. Longer and less deep, straighter back, small fins, and irregular patches of white, orange and black laid as separate veils rather than blended.
- Stylised fish. An exaggerated flat teardrop with oversized cut fins in a contrasting colour. Quick and forgiving.
- A shoal. Five at 6 cm in graded sizes, every fin on all five cut from one prefelt sheet so the colour and thickness match exactly. Hang them at staggered heights and they read as a group rather than five separate fish.
A cut-sheet fin is the same technique as a felted wing, so a fish is good practice before a bee or the wings on an owl. If the flattening caught you out, the depth and pressure habits behind it are set out in needle felting techniques.
Frequently asked questions
What shape is a needle felted fish body?
A teardrop in outline, flattened side to side: deep and rounded behind the head, tapering to a narrow wrist where the tail joins. Seen head-on it should be a narrow blade about a third as wide as it is deep, not a round sausage.
How do you make felted fins that do not flop?
Cut them from prefelt or a thin sheet you have felted flat on your mat, then needle only the base into the body. A fin made from loose fibre laid straight onto the body never firms up evenly and will droop within a day.
How do you flatten a felted body without it going lumpy?
Work the two flat faces alternately, never one side to completion, and press the whole piece between your palms between rounds of needling. Stab straight down into the flat face rather than at an angle, and keep the needle depth the same across the whole surface.
How long does a needle felted fish take?
About ninety minutes for a 10 cm goldfish: forty minutes on the body, fifteen on colour, and the remaining thirty-five on fins. The fins take the largest share of the three, because each one is made separately and then attached.