Needle Felted Cow: The Muzzle Is a Flat Pad, Not a Snout
7 min read Intermediate
We may earn a commission from links on this page, at no extra cost to you. As an Amazon Associate I earn from qualifying purchases. Learn more.
A cow face ends in a broad flat pad, wider than the bridge of the nose above it. Taper the face towards the nose instead and you have made a deer in Holstein markings.
Search for felted cows and you will find a lot of animals that are almost cows. The colouring is right, the ears are right, and something about the face is wrong. It is nearly always the same thing: the maker tapered the head towards the nose, the way you would for a fox or a dog, and a tapering snout on a cow reads instantly as a deer.
A cow's face does the opposite. It narrows slightly through the cheeks and then widens again into a broad, blunt, almost square pad at the front, and the nostrils sit on the flat front surface of that pad. Build that one piece correctly and the rest of the animal is straightforward.
What you need
- Core wool — 45–55 g for a cow about 14 cm long
- White and black corriedale — 15 g white, 8 g black
- A pale pink-grey scrap for the muzzle pad, roughly 3 g
- Cream or bone for the horns, and a little pale pink for the udder or inner ears
- 38 gauge needles for shaping, 40 gauge for the surface and the patch edges
- Pipe cleaners or 1.6 mm wire if you want the legs to bear weight
- Optional: 4 mm black glass eyes on wire
Building the cow
- Roll the barrel. Wind core wool into a firm cylinder about 10 cm long and 6 cm deep, then needle it until it holds its shape. A cow body is deep from spine to belly and fairly flat from side to side — think of a loaf standing on edge, not a sausage.
- Drop the belly. Add wool along the underside behind the ribs so the lower line sags below the level of the chest. That heavy hanging belly is most of what makes a shape read as cattle rather than as a pony.
- Make four short legs. Belly to ground is about the same as the depth of the barrel from spine to belly — the same half-and-half rule as a felted horse, applied to a far deeper body, which is why cattle legs look short when they are not. Straight and thick, with no obvious bend at this scale. Wrap wire if you want them load-bearing, following wire armature for needle felting, and set them well apart at the corners of the barrel.
- Shape the head as a block. Firm a separate oval about 4 cm long, then flatten both sides so it has clear cheek planes and a flat forehead. Do not taper the front. Leave it blunt and slightly open, ready to take the muzzle.
- Build the muzzle as a separate pad. Roll a small amount of pink-grey wool into a ball, then needle it flat on the mat until it is a thick disc about 2 cm across and 8 mm deep, with a squared-off outline. Attach it across the whole front of the head with loose fibres at the back, then needle the join without rounding the front face off.
- Set the eyes wide. Cattle eyes sit on the sides of the head, near the corners of the forehead, so that head-on you see part of each eye rather than two eyes looking straight back at you. Sink two shallow sockets and place the eyes there, not on the front of the face. Guidance on setting and rimming them is in needle felting eyes.
- Add ears and horns. The ears are two flat leaf shapes, made on the mat, attached low and stuck out sideways almost horizontally. Horns, if used, are short cream cones curving forwards and slightly up, set on the outer corners of the poll.
- Join the head. Attach it on a thick neck that comes almost straight forward from the shoulders, held low. A cow does not carry its head high.
- Cover in white, then patch. Wrap the whole animal in a thin even coat of white, firm it down, and only then lay the black markings on top.
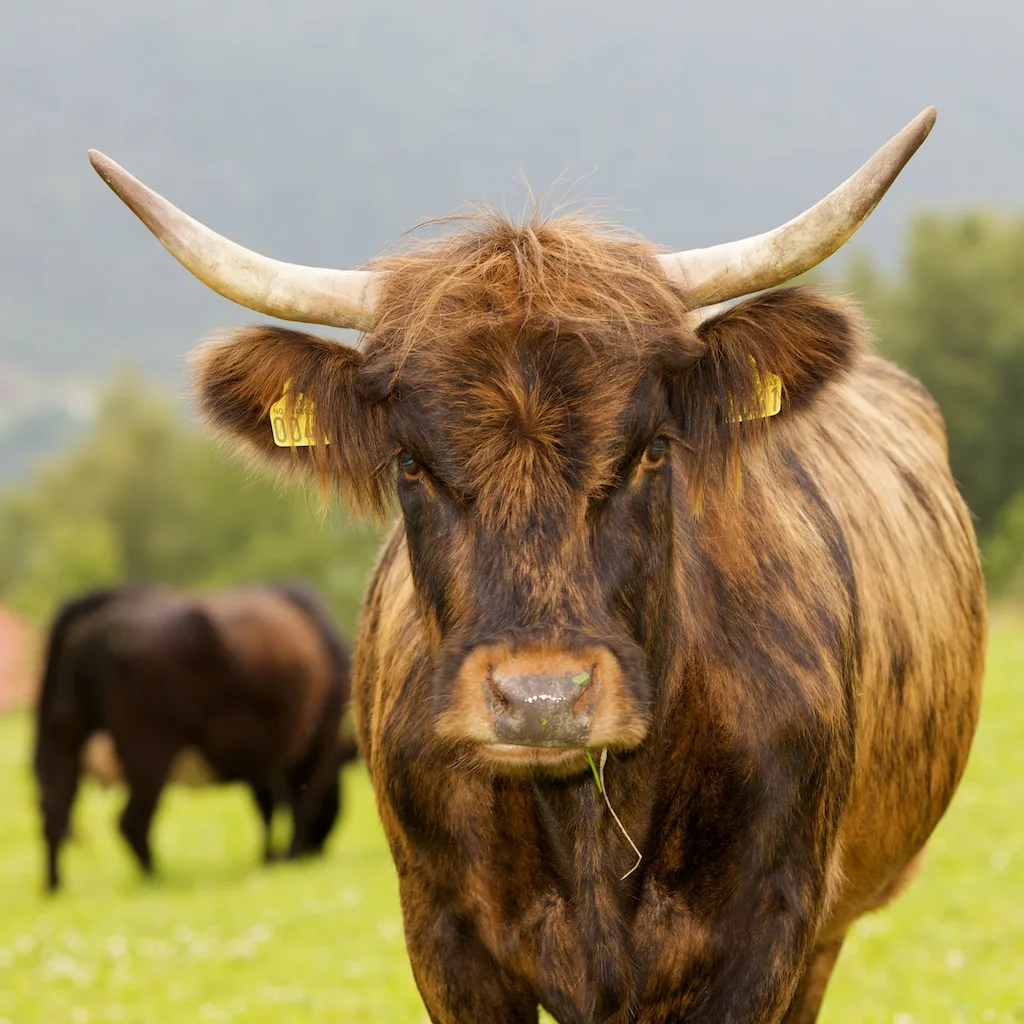
The muzzle pad, in detail
Most felters build the muzzle by adding wool to the tip of the head and needling it into a point, because that is how every other animal is made. On a cow that method cannot produce the right shape, because the finished pad has to be wider than the bridge of the nose directly above it. The cheeks and the bone across them are still the widest part of the head; it is the face between cheek and nose that narrows, and then flares out again at the pad. You cannot get there by tapering.
Make it flat on the mat first, as its own piece. Needle a small ball down against the surface, turn it, needle it again, and keep going until it is a firm slab with two flat faces and a hard edge all the way round. Then attach it standing proud of the head, so the front face stays flat and roughly vertical.
Two details finish it. The nostrils are comma shapes set into that flat front, angled so the tails point down and out — push them in with a 40 gauge needle, deeper than feels necessary, because a shallow dimple vanishes at arm's length. The mouth line runs across the bottom edge of the pad in a long, slightly downturned curve, and it is wider than most people make it.
Patches with hard edges
The temptation with black on white is to feather the boundary the way you would blend a fox's flank. Do not. Holstein markings have edges as crisp as a map coastline, and a soft edge does not read as a marking at all — it reads as a dirty patch on white wool.
Laying a patch
Pull a thin sheet of black, tear it to an irregular outline with lobes and inlets rather than tearing a circle, and lay it on the white. Tack the middle first, then work outwards, and needle the last few millimetres straight down along the boundary with a fine needle, tucking any stray black fibres inwards.
Where the patches go
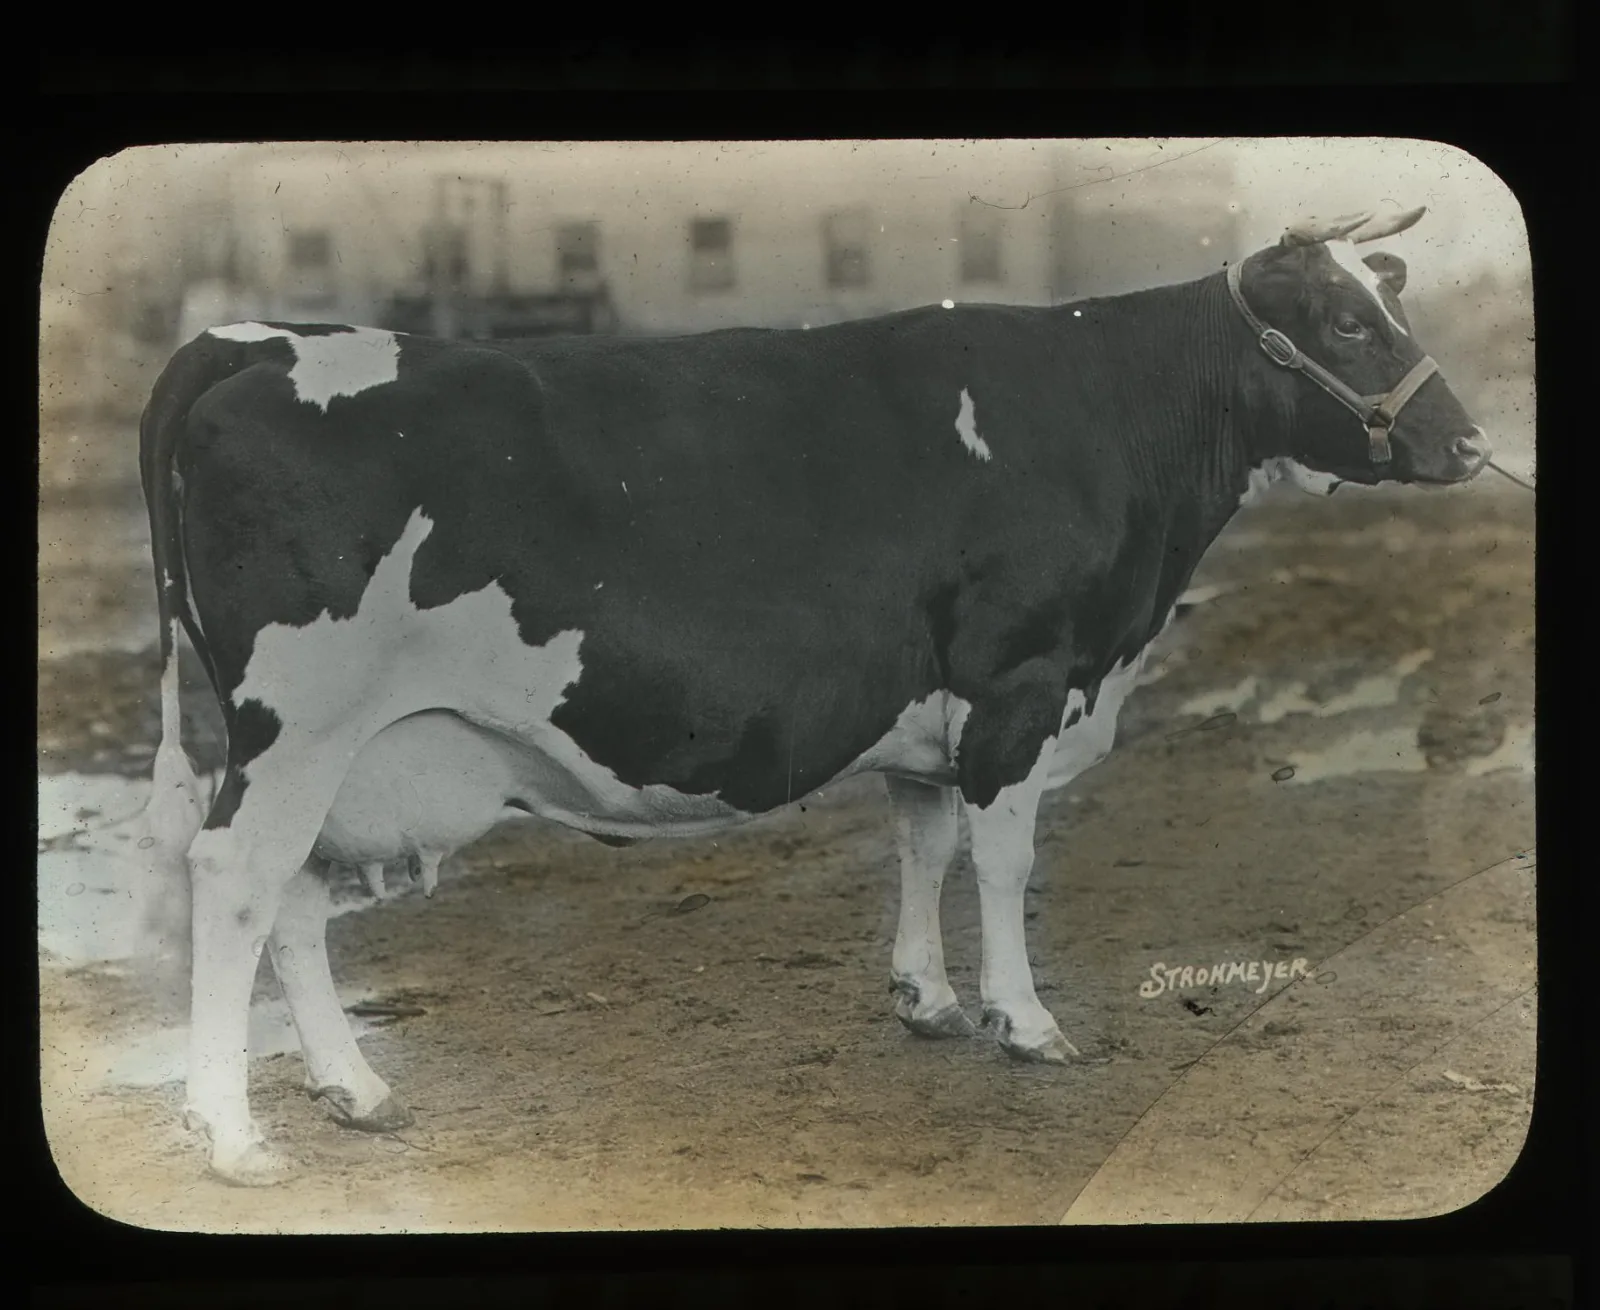
Real Holsteins are white underneath and around the legs, with black concentrated over the back, hips and shoulders. Keep the belly, lower legs and tail switch white, give the head a large black patch over one eye and the poll, and leave the muzzle pale. Asymmetry is the point — matching patches on both sides look printed. This is one of the few cases where blending colours is exactly the wrong instinct.
Common problems
- It looks like a deer. The face tapers all the way to the nose. Add a flat muzzle pad wider than the nasal bridge above it and the problem disappears.
- The patches look like stains. Blended edges. Relay them as separate sheets and needle the boundary hard from the black side.
- The eyes look wrong head-on. They are set too far forward. Cattle eyes go on the sides, near the corners of the forehead.
- The body looks like a dog. The barrel is not deep enough. Add wool along the back and the belly until the depth from spine to belly matches the length of leg below it — a cow looks stumpy because it is deep, not because the legs are stumps.
- Black fibres fuzz across the white. Handle black before white, and keep a lint roller nearby. More on this in needle felting mistakes.
Variations
- Jersey. One warm fawn all over, dark muzzle with a pale ring around it, larger eyes and a finer head. No patching at all, so it is quicker.
- Highland cow. Long ginger coat, a heavy fringe over the eyes, and wide horns that sweep sideways. The fringe carries the whole animal.
- Belted Galloway. Black with one clean white band around the middle — the easiest way to practise hard edges on a curved surface.
- Calf. Same build at two-thirds scale, with proportionally longer legs, a shorter muzzle and no horns.
- Lying down. Legs folded under, no armature needed, and the deep belly does the work. The fastest version of all.
If the flat-piece ears and horns felt awkward, they are the same technique as the ears on a felted sheep, and the barrel body starts the same way as a needle felted ball. For a face with the opposite geometry — everything tapering forward — make a felted dog next; the contrast teaches the muzzle better than reference photos do.
Frequently asked questions
What shape is a cow muzzle?
A broad flat pad, wider than the face directly above it, with the nostrils set into its front face rather than at a point. Build it as a separate flattened disc of wool and attach it across the front of the head. If the face narrows towards the nose you have made a deer.
How do you needle felt black and white cow patches?
Lay each patch as an irregular shape with hard edges, needling right up to the boundary so the colour stops dead. Do not blend or feather the edge — a soft edge on a Holstein reads as dirt on white wool rather than as a marking.
Do felted cows need horns?
Not usually. Dairy Holsteins are routinely dehorned, so a hornless head is perfectly accurate. If you do add horns, make them short, thick at the base and curved forwards and up, never long and straight.
Is a cow a good beginner project?
Not as a first one. The body is one big barrel and the legs are short stumps, but the legs want wire to bear weight, the muzzle is built as a separate pad and attached, and the patch edges have to be laid hard rather than blended. Make a <a href="/needle-felted-chick">chick</a> or a <a href="/needle-felted-hedgehog">hedgehog</a> first, then allow about two hours for this.
Topics
Image credits
- A Holstein cow in side view showing the black and white patches — Community Archives (PUBLIC DOMAIN)
- A cow head on, showing the broad flat muzzle — Ernst Vikne (BY SA 2.0)