Slipper Soles: What to Use, How to Cut It, How to Stitch It On
10 min read Intermediate
We may earn a commission from links on this page, at no extra cost to you. As an Amazon Associate I earn from qualifying purchases. Learn more.
A handmade slipper wears out in one place and it is always the same place. Leather, suede, rubber, grip fabric and latex compared on cost and lifespan, then the cutting, the stitching and the ease problem that makes knitted soles pucker.
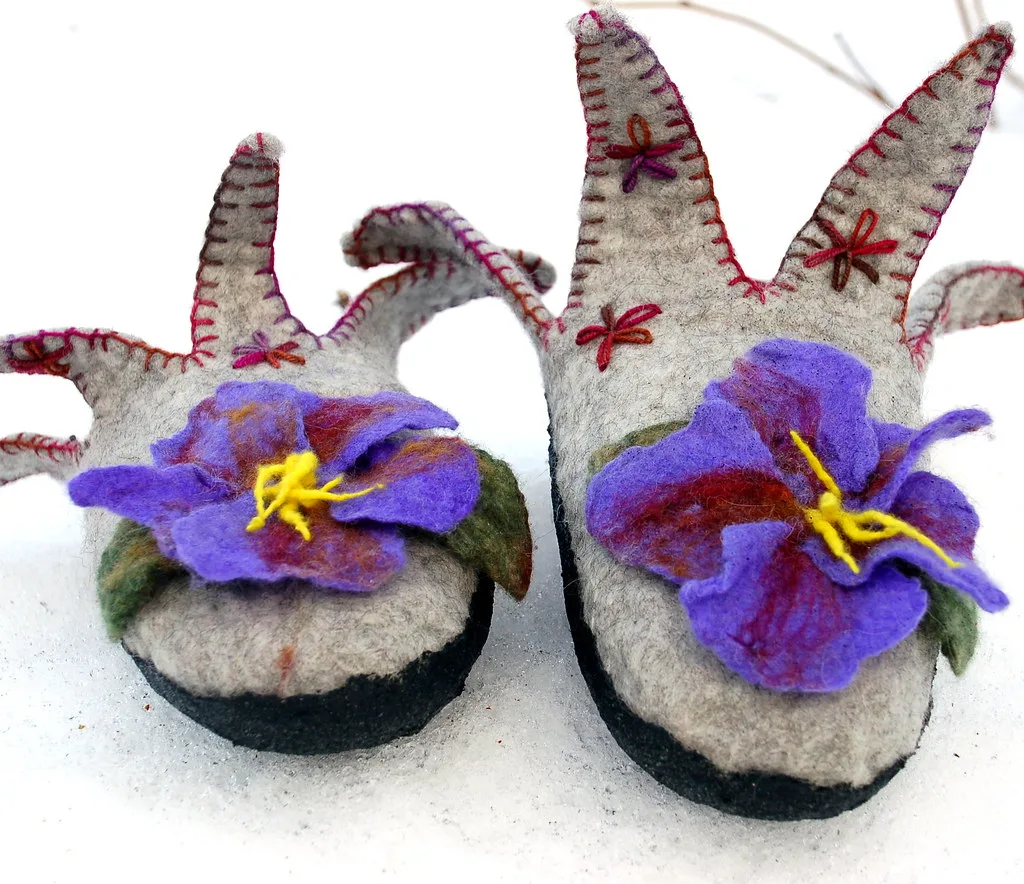
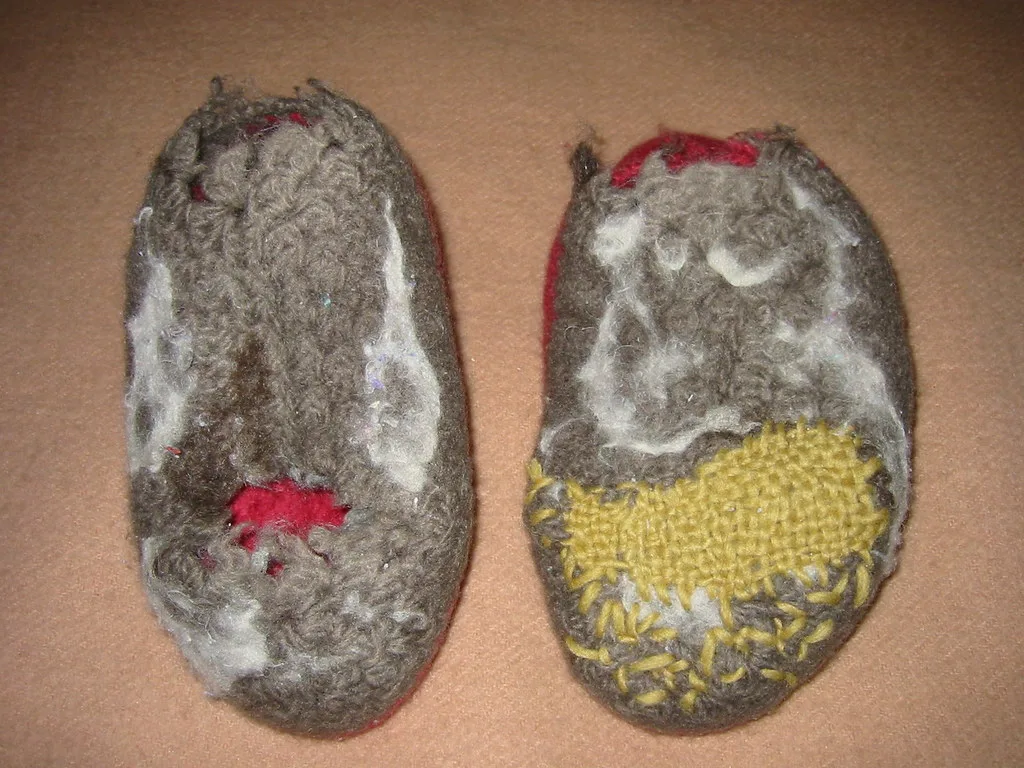
Turn over a pair of handmade slippers worn every evening since October and the wool reports how the wearer walks. Under the ball of the foot is a pale oval the size of a plum, matted flat, slightly shiny, harder to the fingernail than the wool around it. A smaller patch sits under the heel, and between them the fibre still looks new. By March you can see daylight through the plum-shaped one, and then it opens.
That oval is the whole argument for a sole: it is the difference between one winter and three to five times as many.
Two separate problems
A sole does two jobs, and the cheap answers do only one.
- Grip. Bare felt on a hard floor is genuinely slippery — sealed boards, tile and laminate all, and stairs worst of the lot. Latex, puff paint and grip fabric fix this for a few pounds.
- Wear. The ball of the foot takes nearly all the abrasion, and an unprotected wool sole wears through there within a season. Nothing painted on solves that. It needs a layer of leather, suede or rubber thick enough to be ground away for years without reaching the wool.
What to use
Ready-made pre-punched slipper soles
Leather or suede, cut to shoe size and drilled round the perimeter, sold for knitters and crocheters. Needle and thread is the whole kit list, the spacing is even and the shape is right — the obvious first pair. Life: two to three years of daily wear.
Veg-tan leather, 2 to 3 mm
The proper answer. An offcut or small shoulder gives three or four pairs, undercutting the ready-made soles from the second pair on. Veg-tan is firm, takes an awl cleanly and holds a stitch without tearing. Under 2 mm wears through; over 3 mm the slipper feels like a clog. Life: three to five years.
Suede, 1.2 to 1.8 mm
Softer, quieter and far easier to sew. Grips carpet better than smooth leather and hard floors slightly worse, and abrades faster because the nap is the wearing surface. Good for children, and for anyone nervous of an awl. Life: one to two years.
Rubber sheet
Crepe or gum sheet 1.5 to 2 mm, or a shoe-repair topy, one sheet of which does several pairs. Best grip here, and the only material that survives a walk to the bin. Stiff to stitch, so the usual approach is a leather sole with a rubber pad glued to it. Life: four years and up.
Flip-flop and foam soles
The cheapest pair of flip-flops you can find, straps pulled out, gives two cushioned soles 8 to 12 mm thick. Punch holes round the edge and work the first round of a crochet slipper straight into them — which is why the method belongs to crocheters.
One hard condition, and it is the reason this sole ruins projects. EVA foam shrinks by nothing at all. Crochet an upper into a flip-flop sole, then put the lot through a 60 °C wash, and the wool tries to lose a fifth to a third of its length around a rim that loses none: the upper ruffles, the stitches drag at the punched holes, and the join tears. So this method is for slippers that will never be felted — or, if the slipper is a felted one, the sole goes on after felting, after drying, once the size has stopped moving. Foam crumbles at the edges: one to two years. It is thick enough to change the fit, so size the upper for it.
Non-slip grip fabric
Sold as slipper gripper: a knit or woven base printed with latex dots, sold by the metre, which is many pairs. It stretches, so it goes onto knitted and crocheted slippers with none of the ease trouble below. But it is grip, not armour — the wool still wears. Life: one to two years.
Liquid latex
Painted on in dots or a herringbone, one bottle doing many pairs. Dry slipper-side-up for 24 hours, then a second coat. Excellent grip, no bulk, no stitching, no wear protection whatever. Redo yearly as the dots polish off.
Puff and dimensional fabric paint
The cheapest option of all, and in every craft shop. Dots roughly 8 mm apart across ball and heel. Less grippy and less durable than latex: six to twelve months. Cure 24 hours before wearing or the dots flatten permanently.
A second layer of felt
Cut from 3 mm industrial wool felt, or needle felted straight onto the slipper. Doubles the wear life and does nothing for grip — felt on laminate is still felt on laminate. Best as a repair, or a base for latex dots.
Cutting the sole
The shape is not the flat outline of the slipper. A sole domes and turns up at the edge to meet the sidewall, so its pattern is larger than the footprint.
- Draw round the foot standing, weight on it, pencil vertical. A loaded foot is 5 to 8 mm longer and wider than a relaxed one, and it is the loaded shape the sole covers.
- Add a margin. Three millimetres for a firm felted underside; 6 to 10 mm for a soft knitted or crocheted one where the sole curves up the sides.
- Make a left and a right. Mirror the template before you test it or cut it. Two identical soles is the commonest cutting mistake, and it is not recoverable.
- Test each one in paper. Tape it under the matching slipper and stand on it. Wrinkling at the arch means too much margin; wool bulging past it, too little.
- Cut with a blade, several light passes. Scissors curl and bevel anything over about 1.5 mm.
Marking and making the holes
Set holes 3 to 4 mm in from the cut edge. Closer and the stitches tear out to the edge over a couple of winters; further in than 5 mm and a flap of unsupported leather works loose. Mark the line by stepping dividers round the edge rather than measuring with a ruler.
Then cut a stitching groove along that line, on the tread side. A leather groover does it in one pass; the corner of a narrow chisel held almost flat does it in two. You want a shallow channel, half a millimetre or so deep, following the stitch line all the way round. This is standard shoemaking and it is the answer to the obvious objection — that a hole set 3 to 4 mm in from the edge forces every stitch to cross 3 to 4 mm of tread. It does. The groove is what stops that mattering: the thread lies recessed in the channel, below the surface the floor actually touches, so the leather is sanded away year by year and the thread is not. Cut no groove and that crossing thread is the first thing to go.
Pierce the holes along the groove with a diamond-section awl over cork or scrap wood, twisting rather than forcing.
Spacing: 5 to 6 mm for 2 to 3 mm leather, 4 to 5 mm for thin suede, 6 mm for rubber. Beyond 8 mm the fabric balloons between stitches and the edge lifts. Shop-bought soles are drilled at 6 mm, which is why they look right.
Stitching it on
Use braided waxed polyester around 0.6 to 0.8 mm, or linen pulled through beeswax. Ordinary sewing cotton abrades through in a month. A blunt harness needle suits leather; a tapestry needle goes through felt and knitting without splitting yarn.
Whatever stitch you choose, the rule is that the thread stays below the tread surface and never stands proud of it: thread sitting up on the walking surface is ground away long before the leather is, and the sole then unzips. The groove takes care of the part that crosses the tread. Take the needle up through the hole and over the edge, so the rest of the visible thread runs up the cut edge and onto the slipper, where nothing stands on it.
- Saddle stitch. Two needles on one thread, every hole passed from both directions. Much the strongest, because a broken stitch stays put instead of running. Needs both sides accessible.
- Blanket stitch. Loops over the edge, each stitch locking against the last. Forgiving of uneven spacing, easy to ease fabric into, and the right choice for a first pair.
- Whip stitch. Straight over the edge, nothing locking. Quickest, first to fail, 20 minutes to redo — a fair trade on a child's pair.
Start at the centre of the toe, not the heel: round to the heel, fasten off, then the other way from the toe. Any discrepancy between the two outlines then meets itself at the heel, where a slight gather disappears.
Glue, and where it fails
Contact cement bonds rubber to rubber and rubber to leather permanently. It does not hold leather to wool. The ball of the foot flexes twice a step, the leather does not stretch and the yarn does, and the joint peels from the toe within weeks. Glue holds the sole still while you punch and stitch. It is not the fixing.
The ease problem on knitted and crocheted slippers
This has nothing to do with sewing skill. Knitted fabric, and to a lesser degree crochet, stretches under load: the slipper measured empty is 10 to 15% smaller than the same slipper with a foot in it. Leather does not. Cut the sole to the relaxed slipper and it binds; cut it to the stretched size and the empty slipper puckers.
Cut to the standing foot outline plus margin, then distribute the extra fabric instead of letting it collect. Pin the centre toe and centre heel, then the two widest points, then halve each of the four arcs and halve them again — eight to sixteen pins before a single stitch. The excess is then spread in millimetres round the perimeter.
Where a section is still long, take two fabric stitches into one leather hole. Never the reverse: pulling the knitting to reach a hole locks tension in and the slipper feels tight there for good. Fulled fabric is easier, which is one reason a felted slipper takes leather better than a knitted one — see wool shrinkage when felting and felting in knitting.
Soling a felted slipper
Felt is a dense non-woven with no grain, no fray and nothing to ladder, so it is the simplest fabric to sole: a needle goes through anywhere and the hole closes round the thread. What felting actually does explains why.
- Reinforce before felting, not after. Two extra layers of wool over the sole area as you lay out — felted slippers and resist felting.
- Stitch through the full thickness. Fulled wool at the sole is often 4 to 6 mm thick, and a stitch catching only the surface pulls out a plug within a season.
- Repair thin patches first. Lay wool over the worn oval, needle it from both sides, work it with hot soapy water, then sole over the repair — needle felting, wet felting, how to felt without a felting needle.
- Sole it dry, not damp. Wait until the slipper has dried out and its size has stopped moving — a damp slipper is still shrinking, so a sole cut to it will be wrong by the time it is on, and veg-tan darkens and distorts if you work it wet. Fulled felt eases onto a leather outline anyway, without the pinning drama knitting needs. If a section genuinely will not sit, damp the wool alone along the seam line with a sponge and leave the leather dry.
Manufacturers do exactly this: the Nordic pairs in best felt slippers are nearly all stitched leather or rubber on felt. Settle any footbed before the sole goes on; the same page covers which footbeds actually support an arch.
How long each lasts
- Puff fabric paint: 6 to 12 months, grip only.
- Liquid latex: about a year, grip only.
- Grip fabric: 1 to 2 years, stretches to fit.
- Suede: 1 to 2 years, easy to sew.
- Foam or flip-flop: 1 to 2 years, cushioned and bulky.
- Ready-made punched leather: 2 to 3 years, no tools needed.
- Veg-tan leather, 2 to 3 mm: 3 to 5 years.
- Rubber on leather: 4 years and up, and the only one that goes outdoors.
Re-sole when the leather under the ball has gone shiny and flexes more than the rest, and before a hole appears. Unpick the stitching, use the old sole as the template for the new one, reuse the holes in the slipper: 45 minutes. Wait until it holes through and you are repairing the wool too.
Most slipper patterns — Fiber Trends' Felt Clogs by Bev Galeskas included — say add a sole and stop there. The above is the missing paragraph. Thread and tools are in felting supplies; if you still need a slipper to sole, start with free felting patterns for beginners.
Frequently asked questions
What is the best non-slip material for slipper soles?
For grip alone, latex-dotted grip fabric or painted-on liquid latex. For grip that also stops the slipper wearing through, a 2 to 3 mm veg-tan leather sole with a thin rubber pad glued under the ball of the foot. Leather on its own is warm and quiet but it is only moderately grippy until it has scuffed up.
Can you glue leather soles onto crochet or knitted slippers?
Not as the only fixing. The ball of the foot flexes with every step, and a glued joint between stiff leather and stretchy yarn peels from the toe end within weeks. Glue is useful to hold the sole in position while you stitch, and it works permanently only between two stiff materials, such as a rubber pad on a leather sole.
How far apart should the stitches be on a slipper sole?
Five to six millimetres for 2 to 3 mm leather, four to five for thin suede. Wider than about eight millimetres and the fabric bulges between stitches and the edge lifts. Pre-punched shop-bought soles are usually drilled at 6 mm, which is why they look right.
When should slippers be re-soled?
When the leather under the ball of the foot has gone shiny and you can feel it flexing more than the rest, and before any hole appears. Replacing a worn sole is about 45 minutes. Replacing one that has holed through into the wool means repairing the slipper first.