Resist Felting: How a Resist Turns Flat Wool into a Hollow Shape
7 min read Intermediate
We may earn a commission from links on this page, at no extra cost to you. As an Amazon Associate I earn from qualifying purchases. Learn more.
A sheet of plastic between two layers of wool is the entire technique behind felted bags, bowls, hats and slippers. How to cut one, wrap it and get it out.
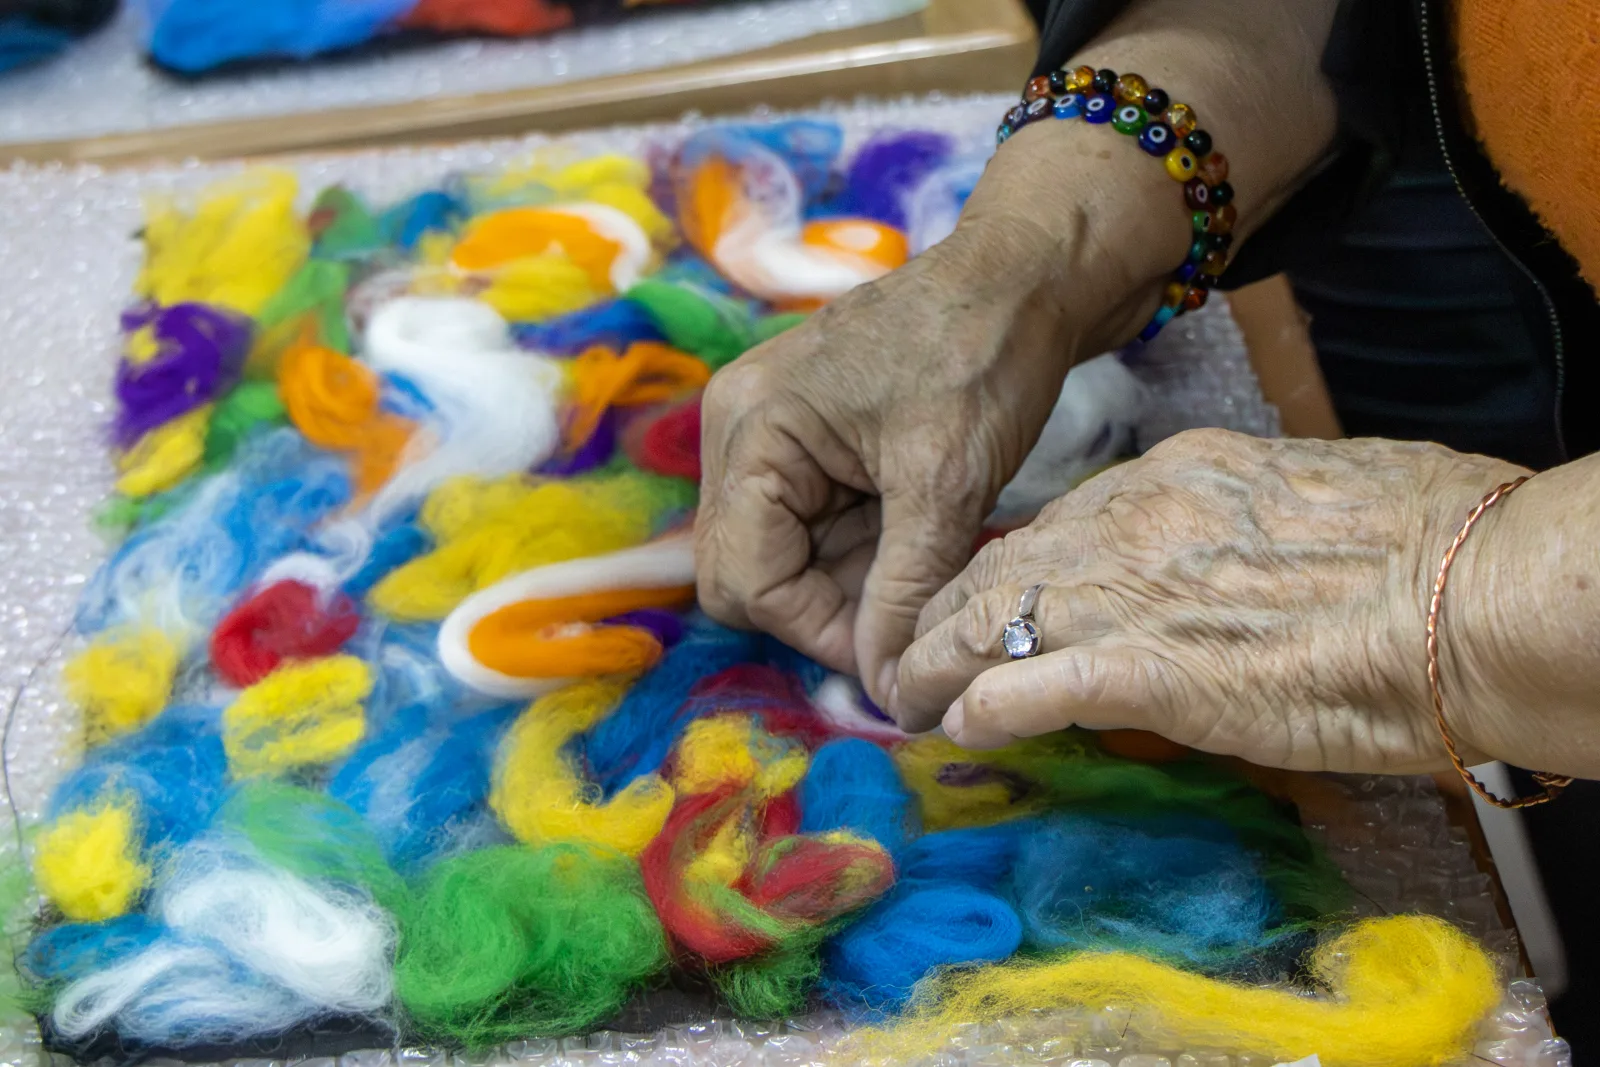
Every seamless felted object — every bag, bowl, hat, slipper and vessel — is made the same way. Wool is wrapped around a flat barrier so the front and back cannot join, and when the barrier comes out, what is left is hollow.
The barrier is called a resist, and understanding it is what turns wet felting from making flat sheets into making things.
The principle
Wool felts to wool. It does not felt to plastic. Lay a plastic shape down, cover it with wool on both sides so the fibres wrap around the edges, and those wrapped edges felt to each other while the two faces stay separate.
The result is a closed pocket. Cut an opening, pull the resist out, and you have a bag with no seam anywhere.
What to make one from
- Thin foam camping mat — the best general choice. Flexible, slightly grippy, cuts with scissors, survives dozens of projects.
- Bubble wrap, several layers taped together — free and perfectly good for a first attempt.
- Plastic document folders or file dividers — good for small flat shapes. Sharp corners need rounding.
- Corrugated plastic sheet — stiff, ideal for hats and anything that must keep a precise outline.
- Laminated paper — fine for small pieces such as purses.
Round every corner. A sharp corner concentrates the wool and leaves a thin, weak point that often tears when you pull the resist out.
Floor underlay, freezer paper and what not to use
| Material | Reusable | Best for | Watch out for |
|---|---|---|---|
| Foam floor underlay, 2–3 mm | For years | Almost everything; the felters' default | Thicker grades leave a soft, rounded edge |
| Freezer paper, coated side out | Once | Small flat pieces finished in one session | Softens and tears as it soaks |
| Plastic folders and file dividers | Many times | Small, flat shapes; inner resists | Stiff: sharp corners cut through wool |
| Heavy plastic sheet, such as a cut-up shower curtain | Many times | Large pieces where a soft edge is fine | Too floppy to hold a precise outline |
| Cardboard, plain paper | No | Nothing | Disintegrate when wet and leave pulp inside |
For a book resist, where several thin resists are stacked like pages with layers of wool between them to make flaps or ruffles, use the thinnest plastic that still lies flat: file dividers or 2 mm underlay. Thick foam stacks up too high, and the outer pages end up felting around a much larger edge than the inner ones.
Sizing: allow for shrinkage
The resist must be substantially larger than the finished object, because the wool shrinks around it.
- Merino, firmly fulled: shrinks 35 to 45%
- Corriedale or medium wool: 30 to 35%
- Coarse wool, or a lightly fulled piece: 20 to 30%
The resist is the finished size divided by one minus that rate. A finished bag 12 in (30 cm) tall in merino shrinking 35% needs a resist 12 ÷ 0.65 ≈ 18½ in (46 cm) tall. Adding the percentage instead of dividing by it is the classic mistake, and it comes out about 2 in short. Shrinkage is also directional — pieces shrink more along the direction you roll them — which is covered in wool shrinkage when felting.
Make a test piece the first time with a new wool. An 8 in (20 cm) square felted the way you intend to work tells you your personal shrinkage rate, and that number is good for every project afterwards.
Wrapping it
- Lay the first layer of wool over the resist, fibres running one way, overhanging every edge by about 1½ in (3 to 4 cm).
- Second layer at right angles. Two thin layers per side is the minimum; three for a bag that must hold weight.
- Wet and press that side with warm soapy water until it is flat and dark, with no air trapped.
- Turn the whole thing over and fold the overhanging fibres onto the back, smoothing them flat. This wrapped edge is what becomes the seam.
- Lay the back layers the same way, again overhanging, and fold those edges over to the front.
- Wet, press, and check the edges. Thin spots along the fold are the commonest failure, and they are trivial to fix now with a wisp of wool.
Open and closed resists
Everything above describes a closed resist: wool wraps every edge, the resist is sealed inside, and you cut it out. It gives the cleanest, strongest result and it is what most patterns mean by "resist".
An open resist leaves one edge deliberately unwrapped: the wool on each side stops at that edge instead of folding round it. That edge becomes the opening without any cutting, so the rim is a natural felted edge rather than a cut one, which suits vessels with a soft, wavy lip. The cost is that the open edge is thinner and wanders as it shrinks; lay an extra wisp along it and expect to trim.
Felting it
Rub gently through net or bubble wrap, both sides, until the surface holds together. Then roll — in a bamboo mat or a towel, 50 rolls, unwrap, turn 90 degrees, repeat. The whole process is the same as flat wet felting, only wrapped.
Two habits specific to resist work:
- Rub the edges deliberately. Fibres over a fold get less friction than the flat faces and stay weak if ignored.
- Check for the resist felting through. If wool from front and back has met around a thin patch, ease it apart early with a finger.
Cutting it out
Test first: pinch and pull. If the wool holds firmly and no fibres separate, it is ready. If it stretches apart, keep felting.
Cut the opening with sharp scissors — straight across the top for a bag, a circle for a vessel. Ease the resist out slowly; folding it helps. Then reach inside and smooth every internal surface.
Now do the most important step: keep felting with the resist out. Fulling after the opening is cut is what firms up the cut edge and makes it look intentional rather than raw.
Cutting extra holes
Handles, thumb holes and slots for a cord follow the same timing as the main opening: only once the pinch test passes, never on a piece that still pulls apart. Mark the hole small, about two thirds of the size you want, because the cut edge stretches as you work it. Cut it with the resist still inside so the scissors cannot catch the back layer, then rub the raw edge between soapy fingers until it rounds over. A hole cut too early, while the wool is still loose, keeps growing every time the piece is rolled.
Shaping
Once hollow, the piece can be moulded while wet — over a bowl, a hat block, a ball, a shoe last, a jar. Wet felt takes and keeps whatever shape it dries in, which is what makes bowls, hats and bags possible at all.
Two straightforward first projects built this way are a wool sauna hat and a bowl.
More than one resist
Extra resists give extra pockets. A small one inside a large one produces an internal pocket; two side by side produce mittens or slippers from one piece. It scales up as far as your patience does.
Resist shapes and what they make
| Resist shape | Makes | Where to start |
|---|---|---|
| Circle | Bowls, berets, pods | Wet felting a bowl, wool beret |
| Dome or bell | Hats, sauna hats, tea cosies | How to make a felt hat, sauna hat |
| Rectangle with rounded corners | Bags, phone and laptop sleeves | Wet felting a bag |
| Foot outline, enlarged | Seamless slippers | Felted slippers |
| Hand outline or mitten | Mittens, puppets | Two resists side by side |
| Large rectangle with sloped shoulders | A seamless vest | Felted vest |
| Tall vase or bottle shape | Felted vessels | See below |
Felted vessels
A vessel is a resist piece that stands up and holds its shape: a vase, a pod, a lidded pot. The resist is the vessel's silhouette laid flat, drawn fatter than you want because the shape pulls in as it shrinks, with the opening as the uncut edge. Three things make it stand:
- More layers than a bag, typically six to eight, with the extra ones in the base and lower walls.
- A coarser wool in the inner layers, which fulls harder and stiffer than merino.
- Shaping wet over a form (a jar, a balloon, a ball) and letting it dry completely on it. A thin wash of diluted PVA inside will stiffen a vessel that still slumps.
Cutting the opening small and stretching it during fulling gives a neat, narrow neck; surface texture comes from locks, silk or prefelt laid on the outermost layer before wetting.
Frequently asked questions
What is a resist in felting?
A flat barrier — usually plastic or foam — laid between two layers of wool so those layers cannot felt to each other. When the piece is finished you cut it out and the wool is left as a hollow shape with no seams.
What can I use as a felting resist?
Bubble wrap, thin foam camping mat, plastic from a document folder, corrugated plastic sheet, or even a laminated sheet of paper for small pieces. It only needs to be waterproof, flexible and smooth-edged.
How much bigger should a resist be than the finished piece?
Divide each finished measurement by one minus the shrinkage rate. Merino fulled firmly shrinks about 35%, so a 12 inch (30 cm) bag needs a resist about 18.5 inches (46 cm) tall; a medium wool shrinking 30% needs about 17 inches.
When do you cut the resist out?
Once the wool holds together as a single fabric and no longer pulls apart when tugged, but before full fulling. Cutting too early leaves a raw edge that never closes; too late and the piece is already too firm to shape.
Can freezer paper be used as a resist in wet felting?
For a small piece that is felted quickly, yes: the plastic-coated side does not felt and it cuts easily. But it is still paper, so it softens, creases and tears as it soaks, and it is good for one use at most. For anything larger, or a shape you will repeat, foam floor underlay lasts for years.
What is a closed resist in felting?
A resist that is completely wrapped in wool on every edge, so nothing of it shows until you cut an opening. Bags, vessels, pods and slippers are made over closed resists. An open resist leaves one edge uncovered, so the opening forms by itself and nothing has to be cut.