Wet Felting a Bag: Resist Method, Handles and Shape
4 min read Intermediate
We may earn a commission from links on this page, at no extra cost to you. As an Amazon Associate I earn from qualifying purchases. Learn more.
A seamless felted bag, made from one resist, thick enough to carry a book. Includes the three ways of attaching handles that do not eventually rip out.
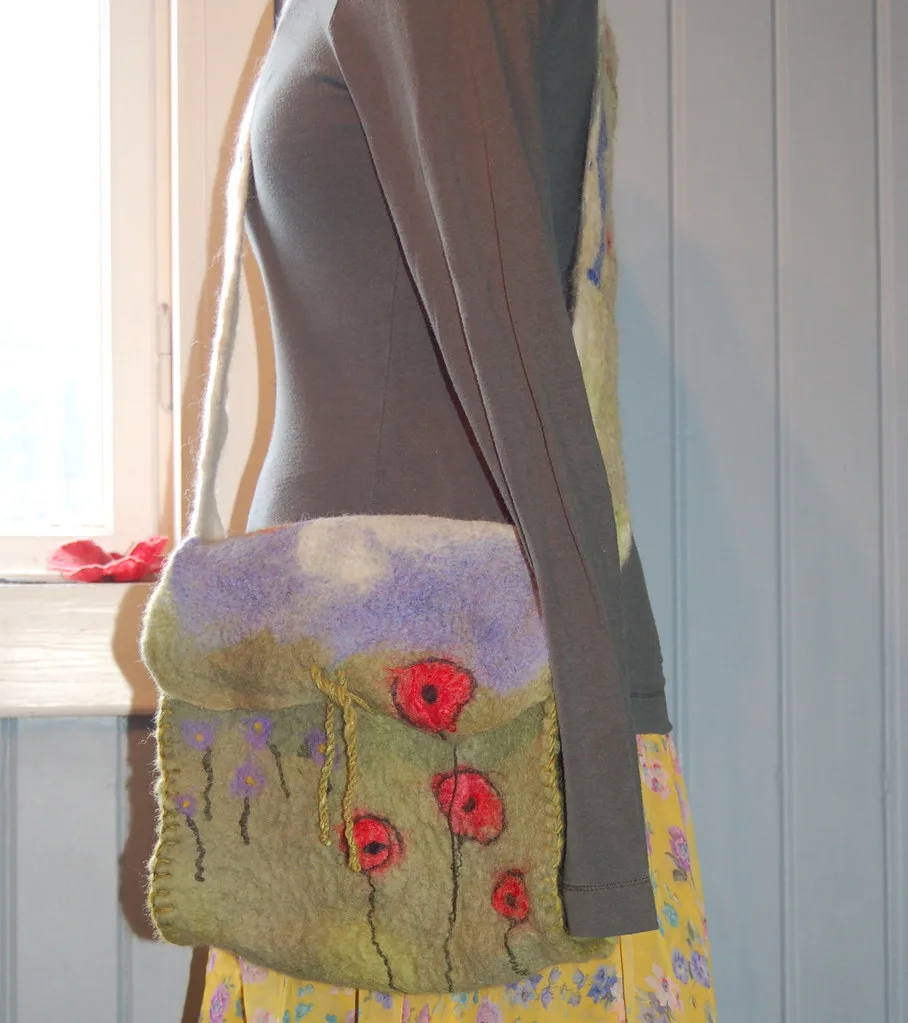
A wet felted bag is one piece of fabric with no seams anywhere, made by wrapping wool around a flat resist. Because there are no seams there is nothing to fail, which is why felted bags outlast the people who make them if they are fulled properly.
What you need
- 150–250 g wool tops. Medium wool gives a stronger bag than merino; a mix of both gives strength inside and a good surface outside
- A resist: foam camping mat, or bubble wrap layers taped together
- Bubble wrap, net curtain, bamboo mat or towel
- Warm soapy water
- Handle material if you are not felting one: leather straps, cord, or metal rings
Sizing the resist
Add 35 to 40% to the finished dimensions in both directions. A bag 30 cm tall and 28 cm wide needs a resist about 42 × 39 cm.
Shape it like the bag you want — a rectangle with rounded corners for a tote, a wider U for a slouchy shape, a tall narrow shape for a shoulder bag. Round every corner. See resist felting for the general rules.
For a flat-bottomed bag, add a rectangular strip at the base of the resist; the bag will fold along its edges.
Layering for strength
This is the difference between a bag and a pouch.
- First layer over the resist, fibres running one way, overhanging by 4 cm on every edge except the top.
- Second layer at right angles.
- Wet through and press flat.
- Turn over, fold the overhang onto the back, lay two layers on this side, wet, press, fold that overhang forward.
- Repeat for a third and fourth pair. Four layers per side is the working minimum for something that will carry a book and a bottle of water.
- Add an extra patch of wool across the base area — the part that will take the weight and the wear.
Leave the top edge flush with the resist, not overhanging, so it is straight when cut.
Felting and fulling
Rub through net, both sides, fifteen minutes. Then roll in a bamboo mat, 50 rolls per direction, four rounds per side, rewetting with hot water as it cools.
Cut the opening across the top when the wool holds firmly to a pinch-and-pull test, remove the resist, and smooth the inside.
Then full hard. Rub, knead, throw the bag into the sink, alternate hot and cold water. A bag needs to be worked further than almost anything else — the fabric should be dense, stiff and slightly leathery, with no visible fibre movement when you pull at it. Expect 35 to 40% total shrinkage.
Handles
Felted in — strongest
Make the straps first: roll two sausages of wool between your palms with hot soapy water until they are firm cords, leaving the ends loose and unfelted. At the layering stage, lay those loose ends between the wool layers at the top of the bag and felt the whole thing together. The handle becomes part of the fabric and cannot pull off.
Sewn — most practical
Leather or webbing straps stitched through the felt with waxed thread and a saddle stitch, with a reinforcing patch of felt on the inside. This is what most commercial felted bags do, and it lets you replace a worn handle.
Rings and hardware
Cut small holes, buttonhole-stitch the edges, and fit metal rings or eyelets. Reinforce with an extra layer of felt behind. Good for detachable straps.
What does not work is needle felting a handle on at the end. It looks attached and it will not stay attached under load — the reasons are in needle felting on fabric.
Shaping
Rinse and squeeze, then stuff the bag with plastic bags, a box or a towel to hold its shape, press the base flat on a table, and leave to dry completely. Two to three days.
For a defined flat base, fold the bottom corners in and press hard while damp; they will set.
Finishing touches
- Lining. Cut fabric to shape and hand-stitch it in. Useful for anything carrying small items, since felt lets pins and coins work their way through eventually.
- Closure. A felted loop and a button, a magnetic snap on a reinforced patch, or a zip stitched in by hand.
- Pockets. A second small resist placed inside the main one during layering makes an integral pocket.
- Surface design. Cut prefelt shapes into the outer layer before wetting, or nuno felt a silk panel into the front.
Care
Spot clean. If a full wash is unavoidable, hand wash cool with no agitation and dry stuffed into shape. Never machine wash a finished felted bag — it will shrink further and it will not shrink evenly.
Frequently asked questions
How much wool do I need for a felted bag?
Around 150 to 250 g for a bag 30 cm tall. Bags carry weight, so use four layers of wool per side rather than the two that would do for a scarf.
How do you attach handles to a felted bag?
Felt them in as part of the piece by leaving loose fibre at the top edge and felting the strap into it, sew leather handles through the felt with a saddle stitch, or fit metal rings through reinforced holes. Handles felted on afterwards will pull off.
Do felted bags stretch?
Only if under-fulled. A properly fulled bag is dense and stable. If a bag sags after a few weeks of use, it needed more work at the fulling stage and can usually be rescued by refelting it.
Can you make a felted bag without a resist?
You can felt two flat panels and sew them together, which is much simpler and gives visible seams. The resist method exists to make bags with no seams at all, which is stronger as well as neater.