Felt Frog: A Needle Felted Sitting Frog and a Sewn Felt Frog Pattern
9 min read Beginner
We may earn a commission from links on this page, at no extra cost to you. As an Amazon Associate I earn from qualifying purchases. Learn more.
Two ways to make a felt frog: sculpted in wool with a needle, or cut and sewn from sheet felt. Both depend on the same two things, the folded back leg and eyes on top of the head.
People searching for a felt frog want one of two things: a small sculpture made by stabbing wool with a barbed needle, or a soft frog cut and sewn from sheet felt. This page covers both, because the part that makes either one read as a frog is the same. It is not the colour. Plenty of green felt things look like lizards, caterpillars or pickles. A frog is recognisable from two features: back legs folded flat against its sides, and eyes that sit on top of its head instead of in its face.
Which felt frog to make
| Frog | Method | Time | Good for |
|---|---|---|---|
| Sitting frog, 5–7 cm | Needle felting, no wire | About 2 hours | A first sculpted animal after a ball |
| Frog prince, 10 cm and up | Needle felting over wire | An afternoon | A gift, or a posed piece with long toes |
| Sewn felt frog | Sheet felt, blanket stitch | About 1 hour | Children's toys, bean bags, sewing with kids |
| Flat frog ornament | Two layers of sheet felt | 30 minutes | A tree, a garland or a keyring |
What a frog looks like, from two sides
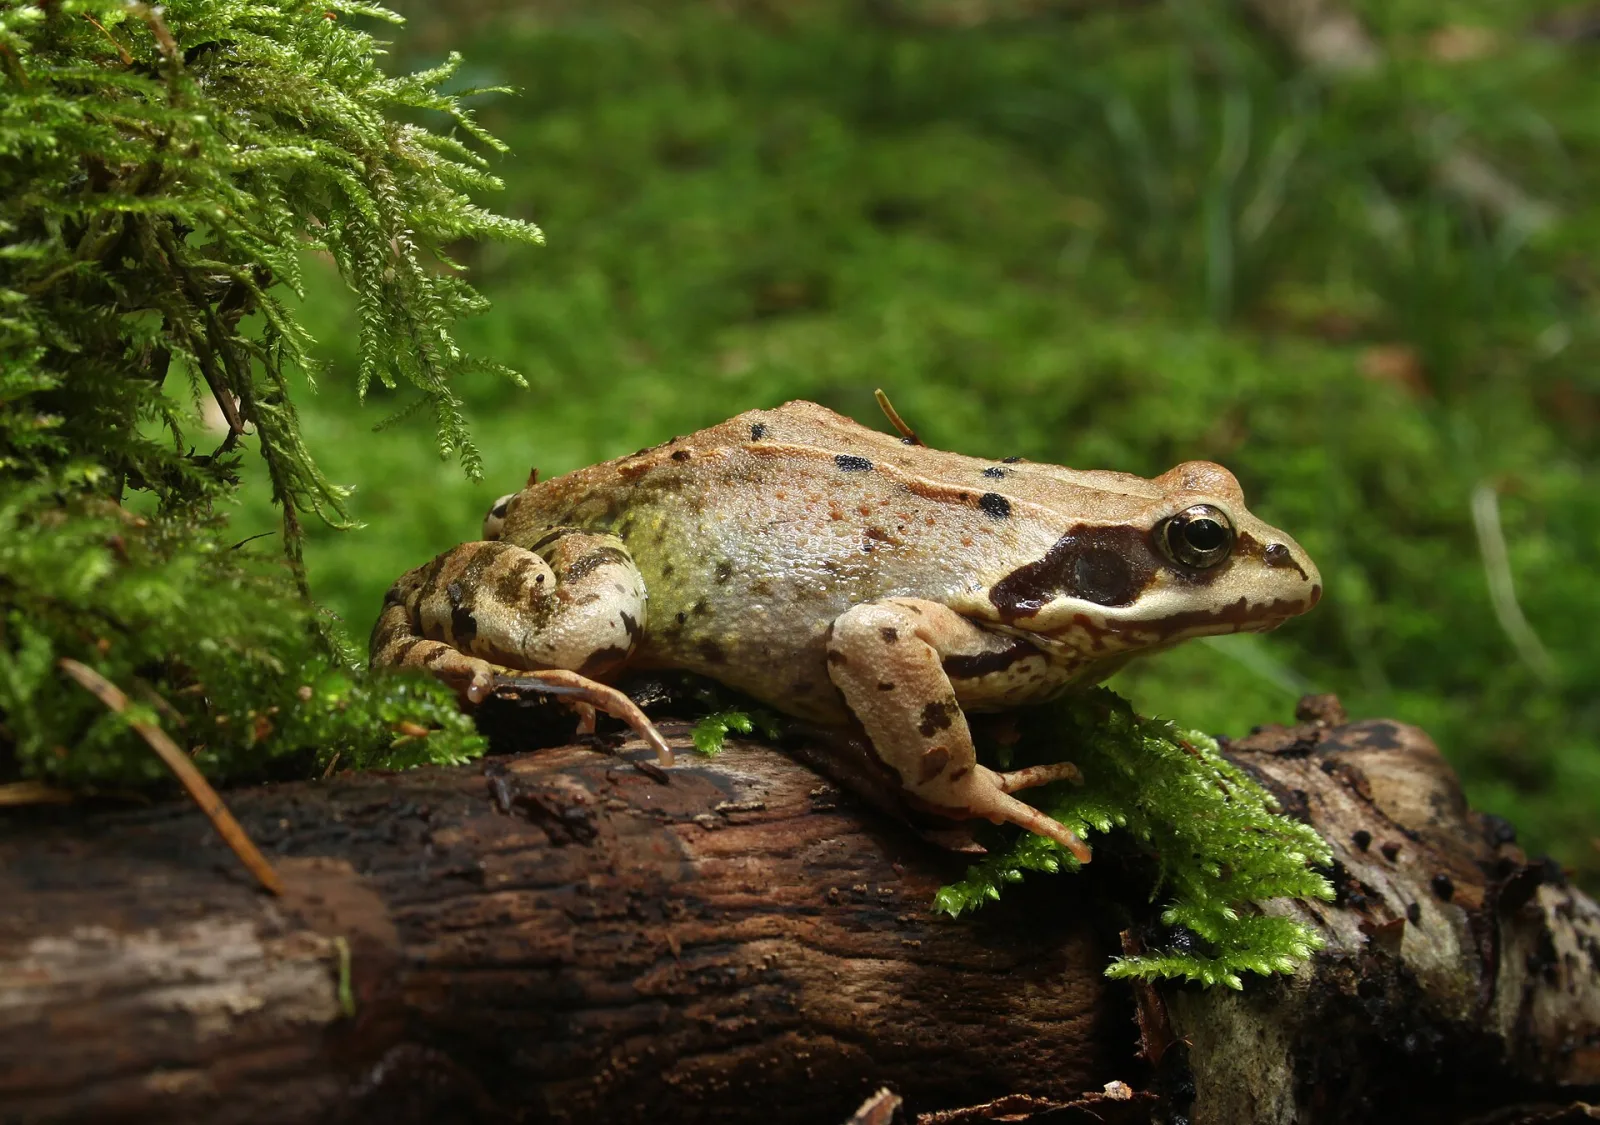
Before any wool comes out, look at a sitting frog from above. The widest part is not the belly and not the shoulders. It is the two knees, sticking out on either side at the height of the back. They end up there because each back leg is folded into a flat Z against the side of the body.
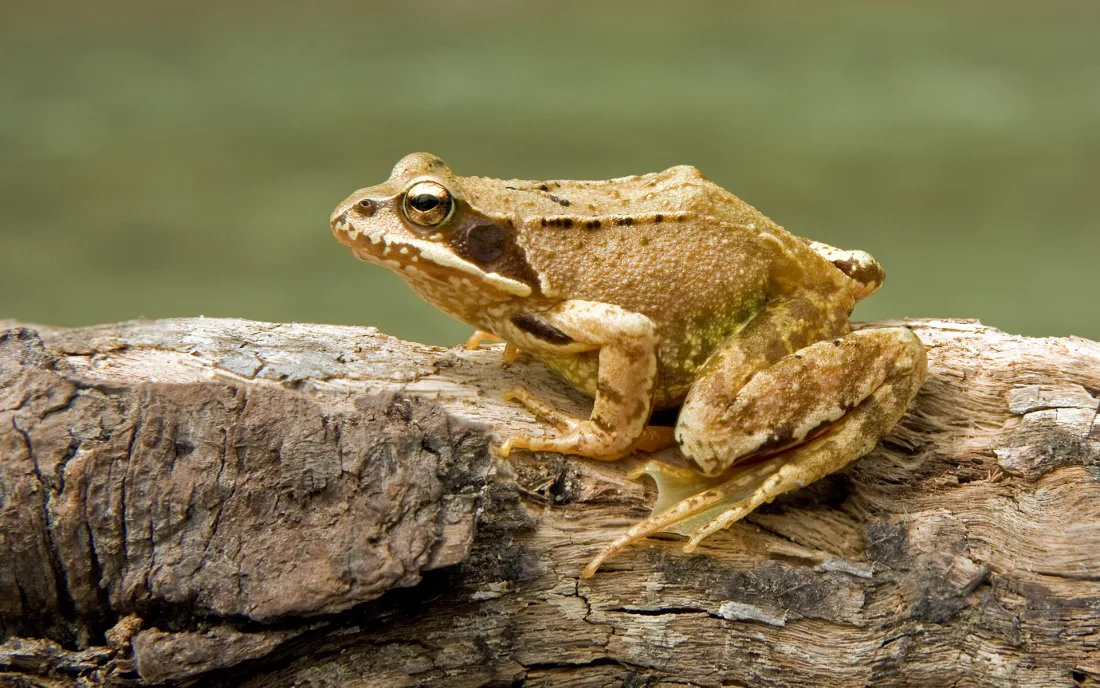
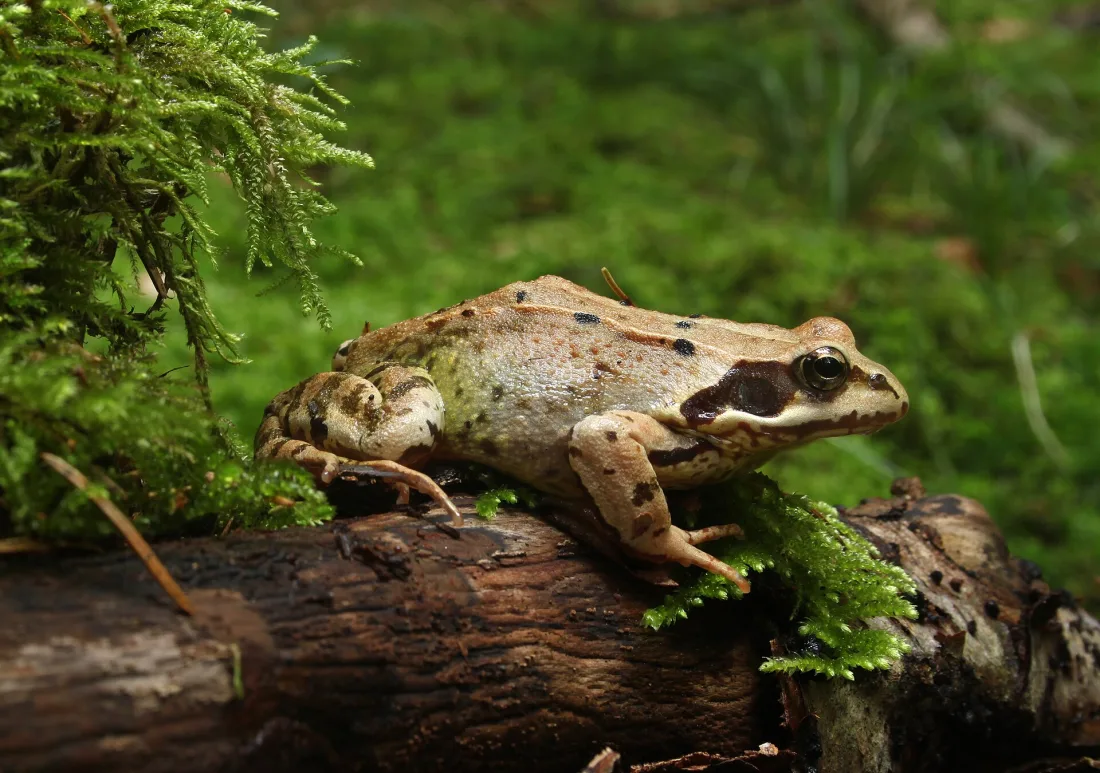
Now look from the front, or from the side at eye level. The eyes are two bumps above the line of the skull, set wide and well back. A frog has no neck and no separate head: the body just narrows into a flat wedge that ends in a blunt snout, and the mouth line runs all the way back to below the eye.
The needle felted sitting frog
Materials for a 6 cm frog
- Core wool: about 20 g
- Olive, mid brown and pale cream corriedale: about 10 g altogether
- A scrap of black or very dark brown for the eyes, mouth and back markings
- Needles: 38 gauge for shaping, 40 for the surface, 42 for the eyelids
- Two pipe cleaners or lengths of 1 mm wire, only if the body will be over 7 cm
Steps
- Body. Needle a firm lump of core wool into a rounded triangle about 6 cm long, wide at the shoulders and narrowing to the rear. Needle the underside flat on the mat until it sits without rocking. It should be about twice as wide as it is tall.
- Head. Needle the front third into a flat wedge that carries straight on from the body. Keep the top of the skull flat, because the eyes go on it later.
- Mouth. With the 40 gauge, cut one deep line from the tip of the snout back along each side to below where the eye will sit, curving up a little at the corner. Go over it twenty or thirty times so it stays.
- Front legs. Two short sausages about 2 cm long with a slight elbow and four blunt toes. Attach them close together under the chest and nearly upright. They hold up the front of the frog.
- Back legs. Make each one as three roughly equal sections, thigh, shin and foot, and fold them into a Z (see below). Make both before attaching either, and compare them.
- Attach the back legs high. The hip joins at the top of the flank, so the folded knee comes level with the back or just above it. Press each leg flat against the body and needle through the thigh from several directions.
- Colour. Olive over the back and the outer side of every leg, turning to brown on the flanks and cream on the throat and belly. Blend where the colours meet. Frog skin is smooth, so a hard stripe shows much more than it would on a furry animal; see how to blend wool colours.
- Eyes, last. Two domes on top of the head, wide apart and well back, built as described below.
Folding the back leg
From the side, the back leg is a flattened Z. The thigh runs forward and upward from the hip, so the knee sits alongside the middle of the body, above the line of the back. The shin folds back down and to the rear. At the ankle, the long foot turns forward again, with the toes pointing along the body.
For a frog up to about 7 cm, felt the fold solid. Roll a long thin sausage, leave the last centimetre loose for attaching, fold it at the knee, and needle straight through the fold from both faces until the fibres lock across the bend. Fold again at the ankle. Firm the whole leg hard: a soft fold slowly opens up under its own weight.
Above 7 cm, bend a pipe cleaner into the Z first, leaving a straight tail at the hip to push into the body, and wrap it thinly before building up the thigh. The advantage of wire is that you can still adjust the knee after the frog is coloured. Wire armature for needle felting has the method. Use the same method on both legs, because a wired leg and a solid one firm up differently and the frog ends up crooked.
Eyes on top
Make each eye as a separate ball of core wool about 5 mm across and needle it onto the top of the head, not into it, so it stands up. Set them near the outer edge of the skull and well back. Cover the outer half of each dome with a thin layer of olive and run a dark lid line round the lower edge. If you use glass eyes, set them into the front of the dome and outline each one thinly in dark wool (needle felting eyes covers sizes and placement). Last, add the eardrum: a flat disc a little smaller than the eye, just behind and below it.
The frog prince and bigger frogs
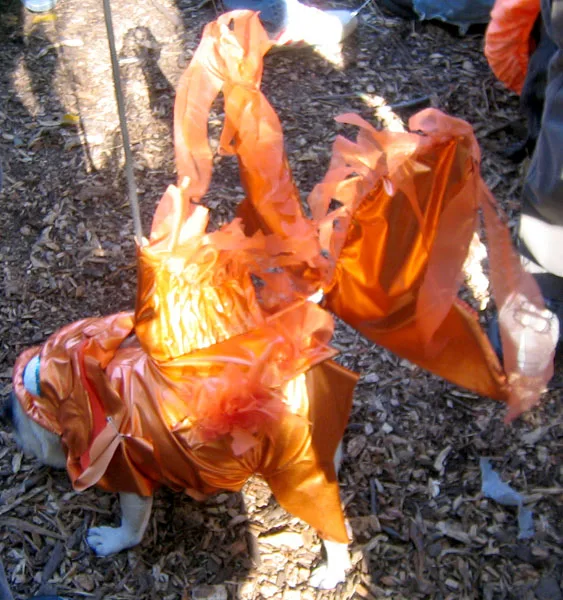
The frog in the photo at the top of this page breaks the rules on purpose: its legs are stretched out flat, its toes are long and separate, and its eyes are huge. That works for a character piece because everything is exaggerated equally. To make one, wire all four legs and every toe, felt the toes thin over the wire and finish the tips with a small flat pad each. Give it a crown of gold felt or wool wrapped round wire. At this size, bring in yellow, lime and a little blue as well as olive, or the large green areas look flat.
A sewn felt frog pattern
This is the frog for anyone who would rather sew than stab, and for a child's first sewing project. You can draw the pattern freehand on paper in a few minutes.
Pieces
- Body, cut 2: a pear shape about 10 cm tall and 8 cm wide, the narrow end at the top. The narrow end is the head, so the whole piece should look like a fat teardrop.
- Back legs, cut 4: a long bent shape about 9 cm from hip to toe, like a stretched letter L with three rounded toes at the foot.
- Front legs, cut 4: the same idea at half the size, about 4 cm.
- Eyes, cut 2 in white and 2 in black: 2 cm and 1 cm circles.
- Belly patch, cut 1 in pale green or cream, optional: an oval about 6 cm tall.
Making it
- Stitch the belly patch onto one body piece with small running stitches or blanket stitch.
- Blanket stitch each pair of leg pieces together and stuff them lightly with a chopstick. Leave the top 1 cm unstuffed.
- Stack the eyes: black circle on white circle, then stitch them near the top of the other body piece. Place them at the top edge, so a little of the white sticks out above the head. That is the sewn version of eyes on top.
- Lay the body pieces together, right sides out. Tuck the flat ends of the legs between them: front legs about a third of the way down, back legs near the bottom and angled forward.
- Blanket stitch round the edge, catching the legs as you go, and leave a 3 cm gap at the bottom.
- For a frog that sits: put a tablespoon of plastic pellets in a small bag of thin fabric, push it to the bottom, then stuff the rest loosely. For a firm toy: stuff it all firmly with wool or polyester fibre.
- Close the gap and stitch a mouth in dark thread from one side of the head to the other.
Wool felt about 1 mm thick is much nicer to sew than acrylic, and it keeps its shape when stuffed. For a flat ornament, skip the stuffing and the pellets, cut the whole frog as one outline in two layers, stitch round it and add a loop at the top. Felt plushies covers stitches and felt choice in more detail, and felt animal ornaments shows how to make an animal hang straight.
Frog colours
| Frog | Back | Underside and details |
|---|---|---|
| Common frog | Olive to brown, with darker blotches | Cream belly, dark patch behind the eye |
| Green tree frog | Bright leaf green | White belly, orange feet, big round toe pads |
| Red-eyed tree frog | Lime green | Blue and yellow flanks, red eyes, orange toes |
| Toad | Grey-brown, lumpy | Pale belly, copper eyes, wider and flatter body |
| Poison dart frog | Solid blue, red or yellow | Black spots or bands, small and slim |
Straight-from-the-bag green looks like a felt-tip pen. Mix in some brown and a touch of grey for anything except the tree frogs, which really are that bright. For a toad, needle small balls onto the back before the last colour layer to make warts.
If it does not look like a frog
- It looks like a lizard or a gecko. The legs stick out sideways and the eyes are on the face. Fold the legs against the body and move the eyes on top.
- It tips back onto its bottom. The front legs are too short or angled forward. They need to be almost upright and long enough to lift the chest.
- The knee droops. The fold was needled from one side only, or the leg is too soft. Needle through it from both faces, or rebuild it with wire.
- The head looks like a separate ball. Needle out any dip at the join, so the head is one continuous shape with the body.
- The sewn frog looks like a pear with legs. The eyes are too low or too small. Move them up until they stick out above the edge.
The folded leg technique works for any animal that tucks its legs in, and the smooth, blended skin is good practice for a bee. For a different kind of challenge, with an easy outline and a harder surface, try an owl, or see needle felted animals for beginners for what to make next.
Frequently asked questions
How do you make a felt frog?
Either needle felt one from loose wool, building a rounded triangular body, folding each back leg into a Z against the side and adding two domed eyes on top of the head, or cut two body pieces and four legs from sheet felt, stitch them together with the legs caught in the seam, and stuff it. The needle felted frog takes about two hours; the sewn one about one.
Where do a frog's eyes go?
On top of the head, not on the front of the face. They are two bumps that stand above the line of the skull, set wide apart and well back. Seen from the side, they break the outline of the head. Put them on the face and the frog looks like a lizard or a cartoon.
Does a felted frog need wire in its legs?
Only above a body length of about 7 cm. Smaller than that, the folded back leg is short enough to felt solid, and a solid fold is quicker and safer for a child to handle. Bigger frogs need wire because a long thigh slowly sags away from the body.
What felt is best for a sewn felt frog?
Wool or wool-blend felt about 1 mm thick. It stitches cleanly, holds a curve when stuffed and does not go shiny where you handle it. Acrylic craft felt is fine for a flat ornament but stretches out of shape in a stuffed toy.
How do you make a felt frog sit up?
Give it a flat belly and some weight low down. On a needle felted frog, needle the underside flat against the mat. On a sewn one, put a spoonful of plastic pellets in a small bag at the bottom before the stuffing, which is also what gives a bean-bag frog its floppy sit.
Topics
Image credits
- A felted frog prince with a gold crown, large eyes and long splayed toes — ingermaaike2 (BY)
- A common frog seen from above — Richard Bartz, Munich aka Makro Freak Image:MFB.jpg (BY SA 2.5)
- A common frog in profile showing the folded hind leg and high-set eye — Holger Krisp (BY 3.0)