How to Make Felt Dolls for Beginners
7 min read Beginner
We may earn a commission from links on this page, at no extra cost to you. As an Amazon Associate I earn from qualifying purchases. Learn more.
Two quite different crafts share the name: needle felted wool dolls, and dolls sewn from felt fabric. Both are beginner projects, and the choice changes everything.
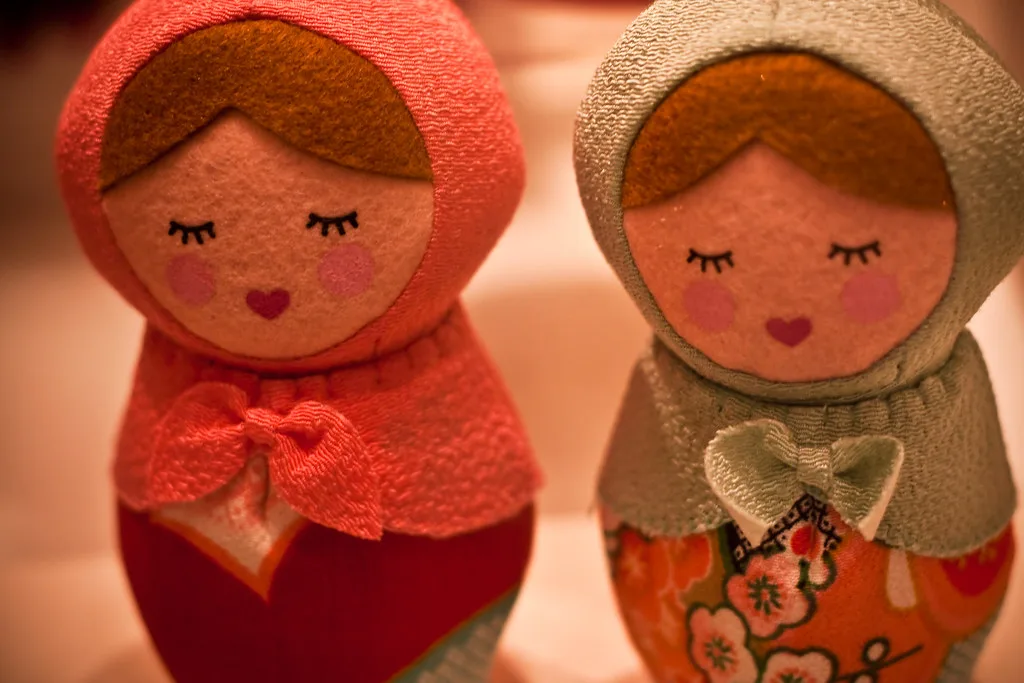
"Felt doll" covers two crafts that share almost nothing but a name. One is a sculpture built from loose wool with a barbed needle; the other is a soft toy cut and sewn from felt fabric. Decide which you are making before you buy anything.
- Needle felted wool doll — sculptural, seamless, firm, made from fibre. No sewing required.
- Sewn felt fabric doll — flat pieces of wool felt cut and stitched, then stuffed. Faster, softer, and it needs a needle and thread rather than a felting needle.
Method one: a needle felted doll
What you need
- Core wool, 20–30 g for a doll about 15 cm tall
- Skin-toned wool for the head and hands
- Coloured wool for clothing
- Wool roving for hair
- 38 and 40 gauge needles, foam pad
- Optional: aluminium wire for a poseable body
The body
- Head first. Wind core wool into a firm ball and needle it hard — a doll's head should be dense, because every feature you add later depends on a surface that does not move. Method in how to needle felt a ball.
- Skin layer. Wrap a thin veil of skin-toned wool over the head and needle it down with a 40 gauge at a shallow angle for a smooth finish.
- Body. A tapered cylinder or cone, felted firm, flat at the base if the doll is to stand.
- Join. Leave loose fibre at the top of the body, press the head on, and needle those fibres up into the head from several angles. Then blend a veil over the neck.
- Arms and legs. Roll thin sausages, leave the ends loose, and needle those loose ends into the body deeply. For anything poseable, put wire down the middle — see wire armature for needle felting.
The face
Restraint wins. A doll with two small needled dots for eyes and a suggestion of a mouth reads as gentle; a doll with a fully modelled face usually reads as unsettling.
- Eyes: needle a shallow socket first, then add a tiny wisp of dark wool, or embroider two French knots.
- Cheeks: the faintest veil of pink, needled very lightly.
- Nose: usually better left out entirely at this scale.
Hair from roving
- Lay a length of wool roving over the head, front to back, longer than the finished hair.
- Needle a firm line down the centre parting to fix it.
- Work around the hairline, needling the roving down where it meets the face.
- Trim to length, or plait, or twist and pin into a bun and needle it in place.
Curly locks, mohair and dyed roving all work. Wool roving is by far the most convincing doll hair there is, and it can be brushed.
Method two: a sewn felt doll
Cut two identical body shapes from wool felt, blanket stitch round the edge leaving a gap, stuff, and close it. Felt does not fray, so there is no seam allowance, no hemming and no turning through — you cut on the drawn line and the outline you drew is the finished size.
It is the right method for a doll that will be played with hard and for making several the same, and it is quicker than sculpting: an evening rather than a weekend. The stitches, the felt grades, the patterns and the safety of the face are all the same job as any other sewn felt toy, and they are covered properly in felt plushies rather than repeated here. The doll-specific parts — hair, proportion, face — are below and apply to both methods.
Proportion is what makes it a doll
A doll is not a small person. Realistic adult proportions put the head at about one-seventh of the height, and a doll built that way reads as a mannequin. Stylised dolls run between a quarter and a third.
For a 15 cm doll, which is a good first size:
- Head — 4 to 5 cm, so roughly a third of the total.
- Body — 10 cm, tapering from about 4 cm at the base.
- Arms — 5 cm, reaching to about mid-thigh. Shorter than feels right.
- Eyes — set low, on or below the midline of the head, and wide apart. High eyes age a face instantly.
That gives a volume of roughly 90 cm³, and firmly needle felted wool settles at about 0.22 g per cubic centimetre, so 20 g of core is the right order — which is where the figure at the top of this page comes from. Scaling up is unforgiving: a 30 cm doll is eight times the volume of a 15 cm one, not twice. The arithmetic is in wool roving for needle felting.
Waldorf dolls, which are a tradition of their own
The soft, plain-faced dolls associated with Steiner and Waldorf schools are made a third way again, and people search for them by name without knowing they are a distinct method.
- The head is wool stuffing bound with string rather than felted — a ball of carded wool is wrapped, then tied horizontally and vertically to pull in a neck and a brow line, so the shaping comes from tension rather than from a needle.
- It is then covered in cotton knit (stockinette), not in felt, which is what gives the characteristic smooth matte skin.
- The face is deliberately minimal — two dots and a mouth, sometimes nothing at all — on the principle that a doll without a fixed expression lets a child project one onto it.
- The stuffing is wool throughout, so the doll warms in the hand and has weight.
A needle felted doll can borrow the aesthetic — plain face, wool stuffing, natural colours — without the head-tying, and that is what most "waldorf-style" felted dolls actually are.
Skin, and getting the colour right
Commercial skin tones are a short and rather pink range, and the honest answer is that most of them suit nobody. They mix well, though, and a doll's face is small enough that 5 g covers it.
- Warm the pink shades with a pinch of yellow ochre; cool them with the faintest amount of grey.
- For deeper tones, build from a mid-brown with a little red rather than darkening a pale one, which goes muddy.
- Card the blend rather than laying colours side by side, or the join shows as a streak across a cheek. Method in blending wool colours.
- Mix more than you need. Matching a skin tone a week later is close to impossible.
Clothes: felted on, or made to come off
Two approaches, and they suit different dolls.
- Felted on. Coloured wool needled directly over the body as the clothing. Seamless, quick, and there is no gap between doll and dress. Right for display pieces and for anything under about 12 cm, where real clothes would be fiddly beyond reason.
- Removable. Cut from thin felt sheet and stitched, or knitted. Slower, and it doubles the play value of a doll for a child. Make the body plain and unclothed underneath if you go this way — a felted-on jumper under a removable one looks wrong the moment it comes off.
Stuffing
- Wool batting — firm, weighty, natural, traditional for waldorf dolls. Tease it into loose handfuls rather than pushing sheets in whole, or you get lumps. See wool batting for felting.
- Polyester toy filling — lighter, cheaper, machine washable.
Stuff firmly. An under-stuffed doll goes shapeless within a week of being loved.
Making one safe for a small child
- No beads, no buttons, no glued anything. Embroider or needle every feature.
- Tug-test each limb hard before handing it over.
- Keep hair short and firmly attached, or needle it down all over.
- Use undyed or well-rinsed wool — see is merino wool itchy on dye residue.
- Count the needles back into the tin. A felting needle lost in a nursery floor is the real hazard here, as covered in is needle felting dangerous.
Where felted dolls go wrong
- The face looks unsettling. Nearly always too much detail, or eyes set too high. Take detail away rather than adding more.
- The head wobbles. The join was made between two already-firm surfaces. It has to be made with loose fibre spread out from the body into the head.
- The doll will not stand. Base not flat, or the head too heavy for the body. Flatten the base against the table, stabbing straight down, and firm the legs before the torso.
- The hair pulls out. Fixed only at the parting. Needle along the hairline as well, and for a doll that will be handled, stitch the parting with matching thread as well as needling it.
- The skin looks patchy. The veil over the core was too thin in places. Another thin layer, not more stabbing at the thin spots.
A sensible first doll
Make a simple gnome-shaped figure before attempting anything with limbs: a firm cone, a head, wool hair, no arms. It teaches the join, the proportions and the face, and it looks finished rather than half-made. From there, add arms, then legs, then wire. The related method is in felted gnome.
Frequently asked questions
What do you stuff a felt doll with?
Wool batting for a firm, weighty, natural feel, or polyester toy filling for something lighter and washable. Wool is traditional for waldorf-style dolls and gives a much better hand.
How do you make doll hair from wool roving?
Lay a length of roving across the head, needle a parting line down the centre to fix it, then trim and style. For long hair, sew or needle a strip of roving along a stitched line so it can be brushed and plaited.
Are felt dolls safe for babies?
Only if they have no small attached parts. Needle felted eyes and embroidered features are safe; glued-on beads and buttons are not. Check that every part is felted or stitched in so firmly it cannot be pulled off.
How long does a felt doll take to make?
Two to four hours for a simple needle felted doll about 15 cm tall, or an evening for a sewn felt fabric doll. Faces and hair take longer than the body every time.