Felted Mushrooms: A Needle Felted Mushroom Tutorial, Cap to Stem
8 min read Beginner
We may earn a commission from links on this page, at no extra cost to you. As an Amazon Associate I earn from qualifying purchases. Learn more.
Two shapes, one join, and the gills underneath that make the difference between a mushroom and a red ball on a stick.
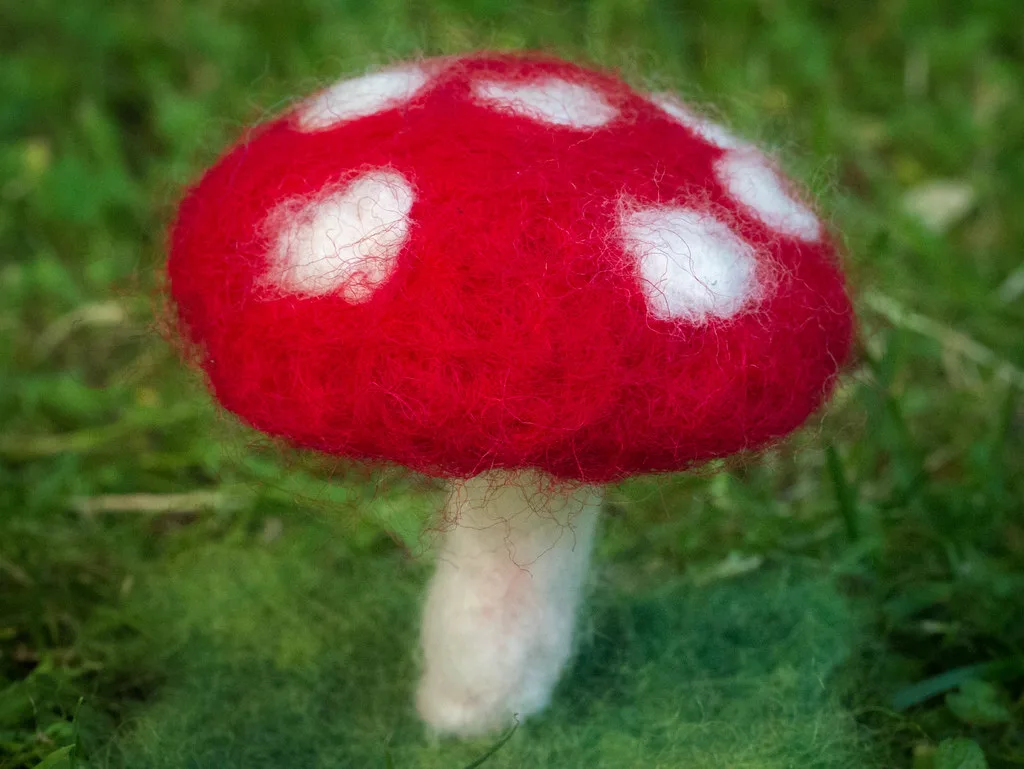
Felted mushrooms are the ideal second project. They are two simple shapes joined together, they look convincing almost immediately, and they scale from a 2 cm ornament to a 20 cm doorstop without changing the method.
What you need
- Core wool for the stem and cap interior, 10–15 g per mushroom
- Red, brown or cream wool for the cap surface
- White or cream for the stem surface and gills
- 38 and 40 gauge needles, foam pad or brush mat
How big should the cap and stem be?
For a first needle felted mushroom, make the cap 2 in (5 cm) across and the stem 2 in tall and ¾ in (2 cm) thick. That size takes about ½ oz (12 to 15 g) of wool and is big enough to hollow the cap properly. As a rule of thumb, make the stem about as tall as the cap is wide, and between a third and two fifths of the cap's width in thickness.
| Size | Cap width × height | Stem height × thickness | Wool, total |
|---|---|---|---|
| Ornament or charm | 1 in × ⅝ in (2.5 × 1.5 cm) | 1 in × ⅜ in (2.5 × 1 cm) | About 2 g |
| Standard toadstool | 2 in × 1¼ in (5 × 3 cm) | 2 in × ¾ in (5 × 2 cm) | 12–15 g (½ oz) |
| Large display piece | 3 in × 2 in (7.5 × 5 cm) | 3 in × 1 in (7.5 × 2.5 cm) | About 50 g (1¾ oz) |
The wool goes up with the cube of the size, so a mushroom twice as wide takes about eight times the wool. Most of it is core wool; the colored surface is only 1 to 3 g even on the large one.
The cap
- Wind a ball of core wool, roughly twice the finished cap diameter, and needle it until firm. The method is the same as needle felting a ball.
- Flatten one side. Press it against the mat and needle straight down into that face repeatedly. As the wool compacts, the opposite side domes.
- Hollow the flat side. Stab repeatedly into the centre of the flat face — the surrounding wool rises around the depression and the cap acquires its overhanging rim.
- Firm the dome with a 40 gauge needle, working at a shallow angle for a smooth surface.
- Add the colour. Lay a thin veil of red or brown over the dome and needle it down. Two thin veils beat one thick one.
Cap shape sets the species. Shallow and wide reads as a field mushroom, tall and domed as a fly agaric, and a funnel with the edge turned up as a chanterelle. A conical cap starts from a different shape; see below.
How do you needle felt a conical mushroom cap?
Start from a cone, not a ball. Roll core wool tightly round itself into a cone about 1½ in (4 cm) tall for a 1¼ in (3 cm) wide cap, needle the wide end flat, and work the point with the needle at a low angle, turning the cone constantly so it stays centred. Then hollow the flat base as for a domed cap, but only shallowly: a conical cap sits on its stem like a hat, with very little rim overhang.
- Tall bell. For a shaggy ink cap, make the cone about twice as tall as it is wide, cover it in white and needle short tufts of white or pale brown on the surface for the shaggy scales. The stem barely shows.
- Pointed hat. For a witch's hat waxcap, make a sharp point and a cap as tall as it is wide, in orange or red, with a slight wave to the rim.
- Round ball. A young mushroom, before the cap opens, is nearly a sphere on a short stem. Felt a firm ball, needle a small dent in its underside and set the stem in it. This mushroom ball is the quickest shape of all, and it makes good garland pieces and the young mushrooms in a cluster.
The stem
- Roll core wool into a firm cylinder, slightly wider at the base.
- Needle all over, rotating constantly, until it is dense enough that it will not squash between your fingers.
- Keep the top end loose and fluffy — do not felt it. That loose fibre is the join.
- Wrap a thin layer of white or cream over the felted section.
A stem thinner than about 8 mm will not hold a cap up. If you want a slender mushroom, put a short piece of wire down the middle before wrapping — see wire armature for needle felting.
The join
This is where mushrooms fail, and it is easily avoided.
- Push the loose fibre at the top of the stem into the hollow under the cap.
- Needle those fibres up into the cap, from several angles, going deep. Surface tacking will not hold.
- Work around the base of the stem where it meets the cap, tightening the junction.
- Lay a thin veil of wool across the join and needle it down to blend the seam away.
Test by holding the cap and gently swinging the mushroom by its stem. If there is any give, needle more.
Why does the cap wobble, and how do you stop it?
A wobbly cap almost always means the stem is not sunk far enough into it. The top of the stem should sit at least ¼ in (6 mm) deep in the cap, ⅜ in (1 cm) on a large mushroom, in a hollow the same width as the stem. If the hollow is much wider than the stem, the cap has nothing to rest on and rocks.
- Felt the stem harder than the cap. The stem carries the weight, and a soft stem bends just below the cap even when the join itself is sound.
- Needle down through the top. After working the loose fibre up from underneath, turn the mushroom over and push a 38 gauge needle from the top of the cap straight down into the stem, a dozen times round the centre. Those long strokes carry fibre across the join in the other direction. Cover the marks with one thin veil of cap color.
- Pin a tall or heavy cap. For a stem taller than about three times its thickness, or a cap over 3 in (7.5 cm) wide, put a length of armature wire up the middle of the stem and into the cap before the final join.
- Give it a foot. Flatten the bottom of the stem against the mat and make it slightly wider than the top, so the mushroom stands rather than leans.
Gills
The detail that turns a shape into a mushroom, and the one most people skip.
- Needled lines: with a 40 gauge needle, work shallow radial lines from the stem outwards. The wool compacts along each line and the ridges between stand proud.
- Laid strands: pull very fine strands of contrasting wool, arrange them in a fan from centre to rim, and tack each one down at both ends.
Even at a glance, the underside is what people look at.
Spots
For a fly agaric, roll tiny balls of white wool between damp fingers and needle each one onto the red cap, working around the edge so the middle stays domed. Vary the sizes — identical spots look printed.
Twelve to fifteen on a 4 cm cap is about right.
How do you make a red cap fly agaric look real?
The red cap and white spots say fly agaric, but two details on the stem are what make it look real rather than cartoonish: the skirt and the swollen base.
- Skirt. Felt a thin strip of white wool on the mat about ⅜ in (1 cm) wide, long enough to go round the stem. Wrap it round the stem about a quarter of the way down from the cap, needle only its top edge down, and let the lower edge hang free with a slight ruffle.
- Swollen base. Add wool round the foot of the stem to make a bulb about one and a half times the stem's thickness, then needle two or three rough rings of small white tufts round it.
- Cap color. A real cap is brightest in the middle and often fades to orange towards the rim. Two veils, scarlet over the centre and orange-red round the edge, read better than one flat red.
Variations
- Ornaments — small mushrooms with a thread loop needled into the top of the cap. They sit naturally among felted Christmas ornaments.
- Garland — eight or nine on a cord, alternating sizes and colours.
- Mushroom house — a large cap on a fat hollow stem, with a needled door and windows.
- A cluster — three mushrooms of different heights joined at the base on a felted mound with a little green moss wool. Far more effective displayed than one alone.
- Wet felted caps — felt a small bowl shape over a resist for a hollow cap. Method in wet felting a bowl.
- Pincushion — a large firm cap on a wide stem, weighted with rice.
A sewn felt capped mushroom from sheet felt
For a soft mushroom from felt sheet rather than loose wool, cut a circle about 4 in (10 cm) across for the cap. Cut a narrow wedge out of it, from the edge to the centre, and whip stitch the cut edges together, so the circle becomes a shallow cone. Run a gathering stitch round the outer edge, stuff the cap lightly and pull the gathers in to leave a hole about ¾ in (2 cm) wide underneath.
The stem is a rectangle 3 × 2 in (7.5 × 5 cm) rolled tightly into a tube and stitched along the seam, with a felt circle stitched on as the base. Push its top into the hole under the cap and stitch all round. Add spots before you stuff the cap: felt circles with a single stitch through the middle, or white French knots. The stitches themselves are in felt applique.
Making a batch
Work in rotation: wind all the cores first, then bring each one along a stage at a time. Six mushrooms take perhaps twice as long as one, not six times, and a group with varied heights and cap shapes looks far better than a matched set.
For more small projects in the same spirit, see needle felting ideas for beginners.
Frequently asked questions
How do you make a needle felted mushroom cap?
Felt a ball, then flatten one side against your mat by stabbing straight down into it, and hollow the underside by working repeatedly into the centre. The dome forms itself as the middle compacts.
How do you attach the stem to the cap?
Leave loose fibre at the top of the stem, push it into the hollow under the cap, and needle those fibres up into the cap from several directions. Then lay a thin veil of wool over the join and felt it in.
How do you make the gills under a felted mushroom?
Needle shallow radial lines from the centre outwards with a fine 40 gauge needle, or lay thin strands of contrasting wool in a fan and tack them down. Both read as gills at normal viewing distance.
How long does a felted mushroom take?
Around 30 to 45 minutes for a small one. A batch of six takes far less than six times as long, because you work them in rotation.
Why does my felted mushroom cap wobble on the stem?
The stem is not sunk deep enough. Seat it at least 1/4 in (6 mm) into a hollow the same width as the stem, needle the loose fibre up into the cap, then needle down from the top of the cap into the stem. Felt the stem harder than the cap so it does not bend just below the join.