Wool Roving Dreads: Making Wool Dreadlock Extensions
4 min read Intermediate
A wool dread is a length of roving rolled between wet, soapy palms until it locks. Twenty minutes of rolling per dread, and the difference between good and bad ones is entirely in the fulling.
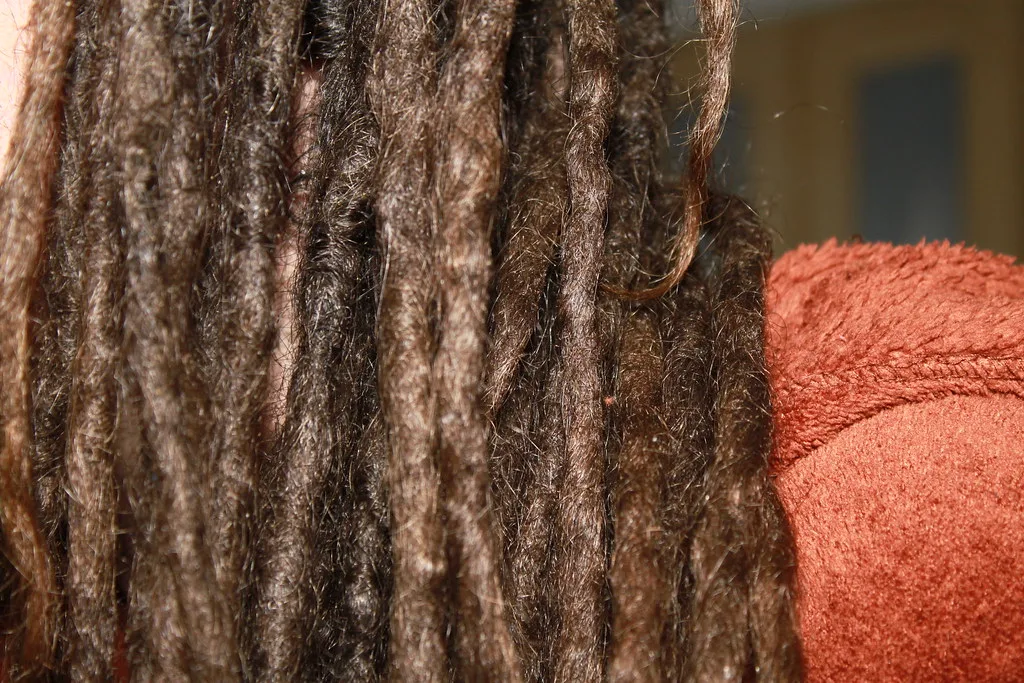
Wool dreads are made by exactly the same process as any other felted cord: heat, soap, and directional friction until the fibres lock. What makes them different from a felted rope is how far you take the fulling, and how carefully you control thickness along the length.
Wool to use
- Merino tops (21–23 micron) — the standard. Felts fast, dyes brilliantly, soft against the scalp.
- Corriedale — coarser, tougher, holds up longer to daily wear. Slightly less soft.
- Blends with a little silk or Firestar — added for shimmer, folded in at the rolling stage. Keep it under 15 per cent or it interferes with felting.
- Not superwash. Treated wool will not felt at all, and every dread will fall apart in your hands.
Buy tops rather than batts — the aligned fibre in tops rolls into a smooth cord, while a batt makes a lumpy one. The difference is explained in wool roving for felting.
What you need
- 500 g wool tops for a full head, less for accent dreads
- Hot water, as hot as your hands will take, and washing-up liquid or olive oil soap
- A ridged mat, washboard or bamboo mat for fulling
- A towel, and somewhere to hang 50 wet cords to dry
Making one dread
- Pull the length. Split the tops lengthways and draft out a piece about 1.5 times the finished length — a 40 cm dread starts as roughly 60 cm of roving. Do not cut; pull, so the ends stay tapered.
- Weigh it. 8–12 g for an average dread. Weighing every one is what stops a head of wildly different thicknesses.
- Wet it. Dip in hot soapy water and squeeze out the excess. It should be wet through but not dripping.
- Roll in one direction only. Between flat palms, firmly, always the same way. Reversing direction unwinds what you have just done. Five minutes gets you a soft cord.
- Keep rolling. Ten to fifteen minutes more, adding hot water as it cools. The cord will shrink, tighten and firm up noticeably.
- Full it. Roll hard on a ridged mat or washboard under running hot water. This is the stage most people cut short, and it is what makes the dread last.
- Test: pinch and pull the surface. If fibres lift, keep going. When nothing lifts and the cord feels like firm rope, it is done.
- Rinse in cold water, squeeze in a towel, and hang to dry. Full drying takes 24–48 hours.
Getting a consistent set
- Weigh every dread before rolling.
- Work in batches of ten so your hand pressure stays consistent within a batch.
- Mark a length on the table with tape and roll to it.
- Make 10 per cent more than you need. Some will come out wrong, and a spare set for repairs is worth having.
- Leave one end slightly tapered and looser — that end attaches to the hair.
Colour
Dye the roving before rolling, not after — dyeing a finished dread felts it further and unevenly. Acid dyes give the strongest colours on wool; the method is in dyeing wool roving, and food colouring works for gentler shades (dyeing wool with food colouring).
For blended, variegated dreads, lay two or three colours side by side along the length before wetting and roll them together — they marble as the fibres migrate. Blending technique in how to blend wool colours.
Attaching them
- Braid-in — a small braid of your own hair, with the dread's loose end braided in and the join wrapped with thread. The standard, and the least damaging.
- Loop and tie — fold the dread in half over a small section of hair and secure with an elastic under a wrap.
- Double-ended — make dreads twice the length, fold at the middle, and attach at the fold for two dreads per attachment point.
Wool is much lighter than synthetic, so a full head puts less strain on the scalp — but the same rules apply: do not attach too tightly, do not take too large a section, and take them out if the roots hurt.
Washing and care
- Wash rarely, and only the scalp. Dilute shampoo, fingertips only, rinse gently.
- No rubbing, no hot-cold cycling, no wringing — those are all felting actions and they shrink and matt the dreads together.
- Squeeze water out in a towel, and allow a full day to dry. Damp wool at the roots is how they start to smell.
- Store unworn sets sealed with a moth deterrent. Moths eat wool dreads exactly as they eat jumpers.
- Refresh fuzzy dreads by rolling them briefly between wet soapy palms again.
Other things to do with the same cord
The technique makes felted cord for handles, drawstrings, necklaces and hanging loops — see wool roving crafts for the full list, and how to make felt balls for the same rolling action in a different shape.
Frequently asked questions
How do you make wool dreads from roving?
Pull a length of roving, wet it with hot soapy water, and roll it between your palms in one direction until the fibres lock into a firm cord. Then full it harder under running hot water, rinse and dry. Each dread takes 15 to 25 minutes.
How much roving does one dread take?
About 8 to 12 g for a 40 cm dread of average thickness. A full head of 40 to 60 dreads takes roughly 500 g of wool, so buy by the 100 g bump rather than in small packs.
Are wool dreads better than synthetic?
They are lighter, warmer, breathable and far more comfortable to sleep in, and they can be dyed to any shade. They also take longer to dry, felt further if washed carelessly, and are vulnerable to moths in storage.
How long do wool dreads last?
Six to twelve months of regular wear if they were fulled hard enough. Under-fulled dreads fuzz, thin and break within weeks — the fulling stage is what determines their lifespan.