How to Sew Beads on Felt: Bead Embroidery Without a Hoop
4 min read Intermediate
We may earn a commission from links on this page, at no extra cost to you. As an Amazon Associate I earn from qualifying purchases. Learn more.
Felt is the best backing for bead embroidery there is — stable, unfraying and thick enough to bury a knot. The three stitches that hold beads, and how to finish the back.
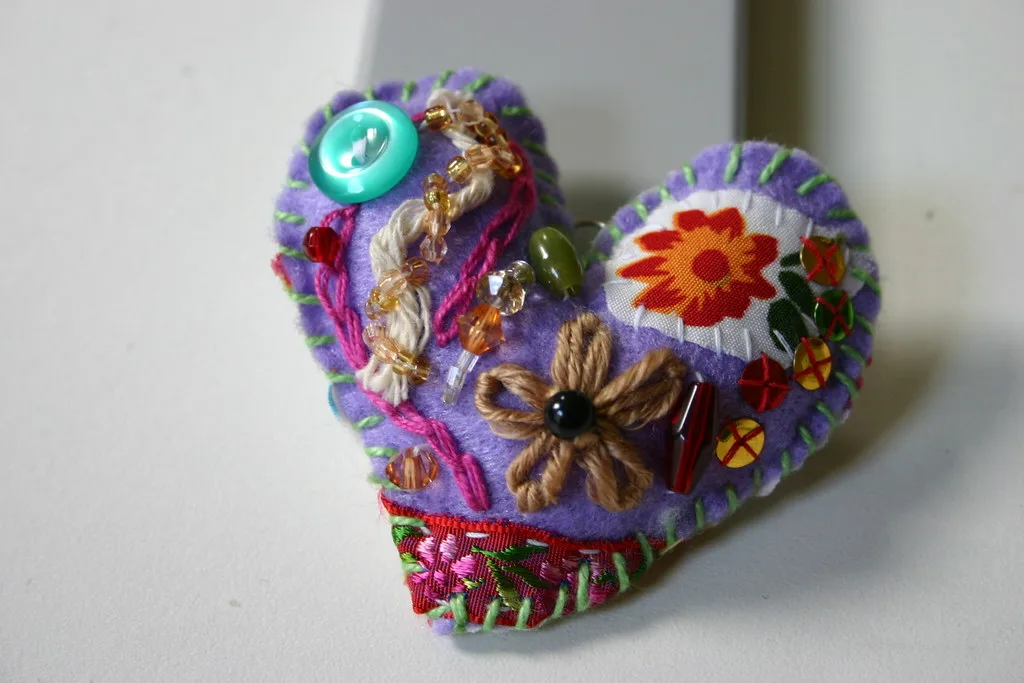
Bead embroiderers use felt as a foundation for a reason. It does not fray, it does not need a hoop, it holds a stitch exactly where you put it, and it is thick enough to hide a knot inside. Anything you might otherwise bead on stretched fabric is easier on felt.
What you need
- Beading needles, size 10 or 12. Long and very fine, so they pass through a seed bead twice.
- Beading thread — Nymo, Fireline or similar. Ordinary sewing cotton wears through against glass over years.
- Wool felt, 1–2 mm. Stiff enough to work on, soft enough to stitch. See wool felt fabric.
- Beads — size 11 seed beads are the standard; size 15 for fine detail; bugles, drops and cabochons for accents.
- Small sharp scissors and a bead mat or shallow dish.
Thread the needle with about 50 cm and work single, not doubled. Doubled thread tangles and fills bead holes you may need to pass through again.
Starting and ending
Knot the thread end, then bring the needle up through the felt from the back. Give the knot a firm tug — it should pull into the thickness of the felt and disappear rather than sitting on the surface. That is a trick felt allows and woven fabric does not.
To finish, take the thread to the back, work two or three tiny stitches into the felt itself, run the needle through the body of the felt for a centimetre, and cut. No visible knot at all.
The three stitches
1. Single bead attachment
Up through the felt, thread on one bead, down through the felt one bead-width away. Repeat.
Right for scattered beads and for anything where each bead sits alone. Slow, and the most secure — every bead is independently anchored, so one broken thread does not lose a row.
2. Backstitch, in twos or fours
The workhorse for beaded lines and outlines.
- Come up, thread on four beads, lay them along the line, and go down at the end of the four.
- Come back up between the second and third bead.
- Pass the needle forward through beads three and four again.
- Thread on the next four and repeat.
Every bead ends up with thread through it twice, which is what keeps a beaded line tight and flat rather than wobbly.
3. Couching
Lay a long strung line of beads on the surface with one thread, then use a second thread to make small stitches over the first between every two or three beads.
Fastest way to cover distance, and the standard method for long curves and filling large shapes.
Tension
Firm, not tight. Felt compresses, so an over-tightened stitch pulls a visible dimple around each bead and the surface ends up quilted. Pull just until the bead sits flat and stop.
Beading an edge
A beaded edge finishes a brooch or an ornament and hides the join between front and backing.
- Come up through the edge of the felt from the back.
- Thread on three beads.
- Go down through the felt a few millimetres along, and back up through the third bead.
- Thread two more beads and repeat.
This produces a neat continuous line of beads standing along the cut edge. It is easier than it sounds and transforms how finished a piece looks.
Finishing the back
Beaded work has an untidy reverse. Cut a second piece of felt slightly smaller than the front, and either whip stitch the two together around the edge or fix them with the beaded edge above.
For a brooch, stitch the pin bar to the backing piece before joining the two — a sewn bar on a piece already assembled is a miserable job. For an ornament, catch a loop of ribbon between the layers at the top.
Beads on hand felted work
Everything above works on hand felted sheet as well as commercial felt, and on felt beads, which take a spiral of seed beads or a few French knots beautifully. Felted balls, being dense, hold a stitch as well as flat felt does.
One caution on wet felted pieces: make sure they are fully dry and fully rinsed before beading. Soap residue tarnishes metal findings and dulls the finish on some beads over time.
A first project
A 5 cm felt circle with a cabochon or a large bead in the middle, three rings of backstitched seed beads around it, and a beaded edge. It uses every stitch on this page, takes an evening, and becomes a brooch. The same beading turns plain felt star ornaments into something that catches the light on a tree, which is the cheapest upgrade available to a cut-felt shape. Repeat it in different colours and you have a set of ornaments.
Frequently asked questions
What needle do you use to sew beads on felt?
A beading needle, size 10 or 12 — long and thin enough to pass through small seed beads twice. An ordinary sharps needle will not fit through size 11 beads and will split the thread.
What thread should I use for beading on felt?
Nymo, Fireline or another beading thread. Ordinary sewing cotton abrades against glass bead holes and eventually breaks, which is how a beaded piece sheds beads years later.
Do you need a hoop to bead on felt?
No. Felt is stable enough to hold its own shape and firm enough to stitch into without support, which is exactly why bead embroiderers use it as a foundation.
How do you stop beads from being loose on felt?
Pass the thread through each bead twice where you can, keep tension firm but not tight enough to dimple the felt, and back-stitch groups rather than sewing every bead individually.