Felt Ball Rug: How to Make One from Scratch
4 min read Intermediate
We may earn a commission from links on this page, at no extra cost to you. As an Amazon Associate I earn from qualifying purchases. Learn more.
Several hundred felt balls, a strong thread and a long evening. How many balls a rug actually needs, how to string them, and how to stop it curling.
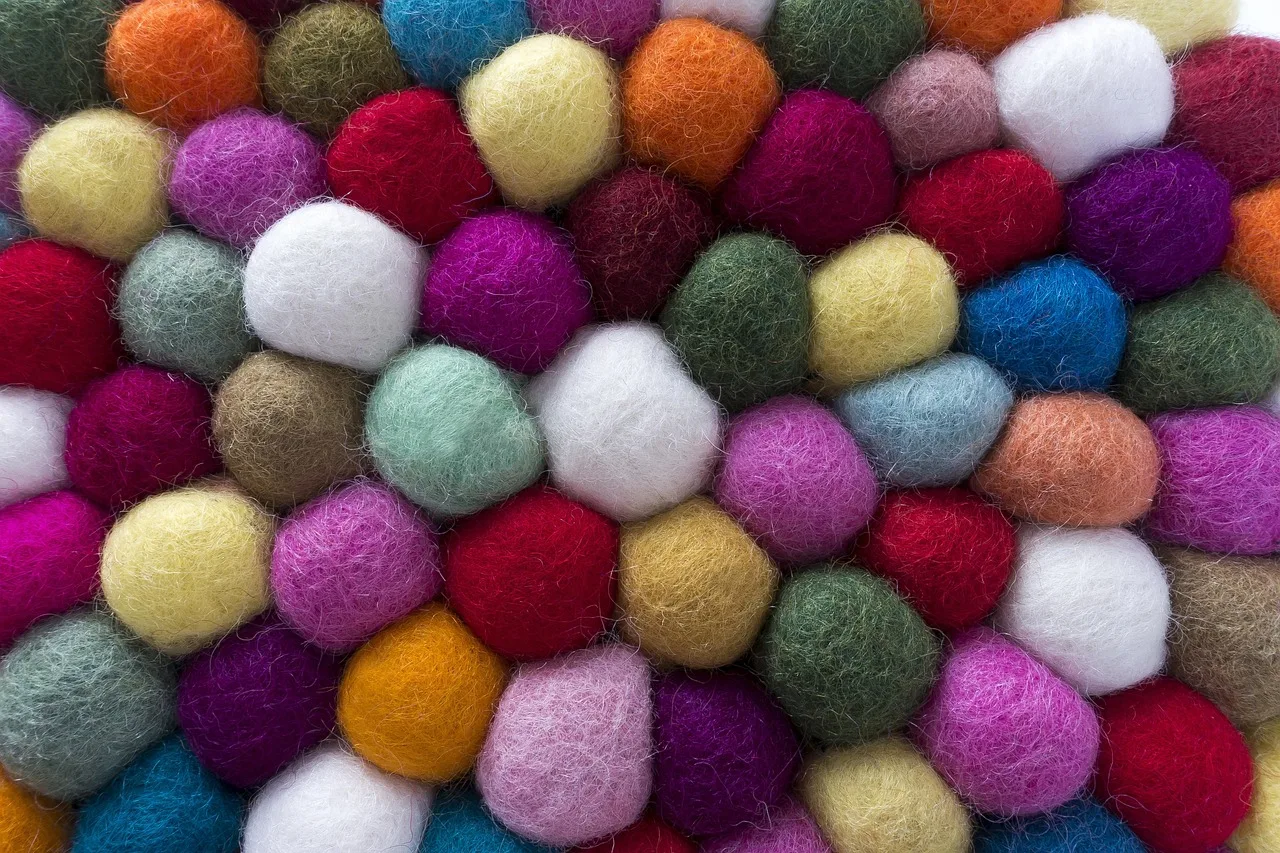
A felt ball rug is hundreds of small wool balls strung together into a mat. It is soft, warm, machine-made versions cost a fortune, and there is nothing complicated about it — only a great many repetitions.
The whole project comes down to two questions: how to make several hundred balls without losing your mind, and how to join them so the rug does not fall apart.
How many balls
For 2 cm balls packed in a honeycomb, roughly 100 balls per 900 cm² of rug.
- 40 × 60 cm bath mat — about 270 balls
- 60 × 90 cm rug — about 600 balls
- 90 cm round — about 700 balls
- 120 × 180 cm — about 2,400 balls
Make 10% more than the calculation says. Some will be the wrong size, some will split when threaded, and running out at the last row is a miserable way to end.
Wool: about 3 g per 2 cm ball, so a 600-ball rug takes roughly 1.8 kg. Buy coarse wool by the kilo — it felts harder and wears better, and softness is irrelevant when the balls are this dense.
Making the balls in bulk
The hand method is in how to make felt balls. For a rug, two approaches make the quantity manageable.
Batch rolling
- Wind all the cores first — an hour or two of mindless winding, done in front of something.
- Work in rotation: roll each ball for thirty seconds through the fragile stage, then move to the next.
- Once past that stage, roll two at a time, one in each palm against the table.
- Rinse and dry as a batch.
Washing machine
Wind the cores, drop each into the toe of a pair of tights with a knot between them, and run a hot wash with a towel for abrasion. The balls come out less perfectly round, which on a rug does not matter at all. This is the sensible choice above about 300 balls.
Consistency matters more than roundness. Weigh the wool for the first twenty so your eye calibrates, then work by eye.
Colour planning
Lay the design out on the floor before threading anything. Options that work:
- Random multicolour — the classic. Genuinely random looks better than an attempted even scatter.
- Two-tone — one dominant plus one accent at about 20%.
- Ombre — graded shades in bands across the rug.
- Bordered — a plain field with two or three rows of contrast around the edge.
Photograph the layout before you start. You will disturb it.
Threading
Use strong waxed thread — button thread, upholstery thread or waxed linen — and a long doll-making or upholstery needle.
- Thread each row as a straight line, pushing the needle through the centre of each ball.
- Pull firm but not tight. Balls squashed together buckle the rug; too loose and gaps show.
- Knot securely at each end and leave a tail.
- Lay finished rows out in order as you go.
Offset alternate rows by half a ball for a honeycomb, which packs tighter and looks far better than a square grid.
Joining the rows — the part that decides whether it lasts
Rows tied only at their ends will sag apart the first time somebody walks on the rug. Every ball needs to be attached to its neighbours.
- Lay two rows side by side in their final positions.
- With a fresh length of thread, stitch through ball 1 of row A, then ball 1 of row B, then ball 2 of row A, and so on — zigzagging along the join.
- Pull each stitch snug so the rows sit tight against each other.
- Knot at the end and start the next pair of rows.
Long, but this is what makes it a rug rather than a set of strings.
Edges and shape
Rectangles are simplest. For a round rug, work in concentric rings from the centre, adding balls to each ring as the circumference grows and joining each ring to the one inside it as you go.
Run a final line of stitching around the whole outer edge to stabilise it.
Backing
- Non-slip underlay cut slightly smaller than the rug — the simplest answer and it comes up easily for washing.
- Hessian or heavy cotton stitched to the back. Adds real stability, and hides the joining threads.
- Latex dots painted onto the underside of the outer balls, for grip alone.
Bare felt balls on a hard floor slide, and a rug that slides is a hazard on a landing or a bathroom floor.
Keeping it flat
Curling comes from uneven tension — rows pulled tighter at the edges than in the middle. Keep the thread tension consistent, and if a finished rug curls, damp it, lay it flat under something heavy and leave it for a couple of days.
Care
Shake it out, and vacuum on a low setting with no beater bar. Spot clean with cool water and wool wash. Never machine wash a finished rug — the balls will felt further and the rug will pull itself out of shape.
Individual balls can be cut out and replaced if one wears through, which is a good reason to make a dozen spares and keep them in a bag.
Frequently asked questions
How many felt balls do you need for a rug?
Roughly 100 balls of 2 cm per 900 square centimetres. A 60 x 90 cm rug needs about 600 balls; a 90 cm round rug needs around 700. Count on more than you think.
How do you join felt balls into a rug?
Thread them in rows on strong waxed thread with a long needle, then stitch the rows to each other, catching each ball to its neighbours on both sides. Rows joined only at their ends will not hold together.
Does a felt ball rug need a backing?
Not for strength, but it helps enormously with slipping and keeps the rug flat. A non-slip rug underlay, or hessian stitched to the back, both work.
How long does a felt ball rug take to make?
The balls are the bulk of it — plan on several evenings for 600, or buy them ready made. Threading and joining a medium rug takes eight to twelve hours.